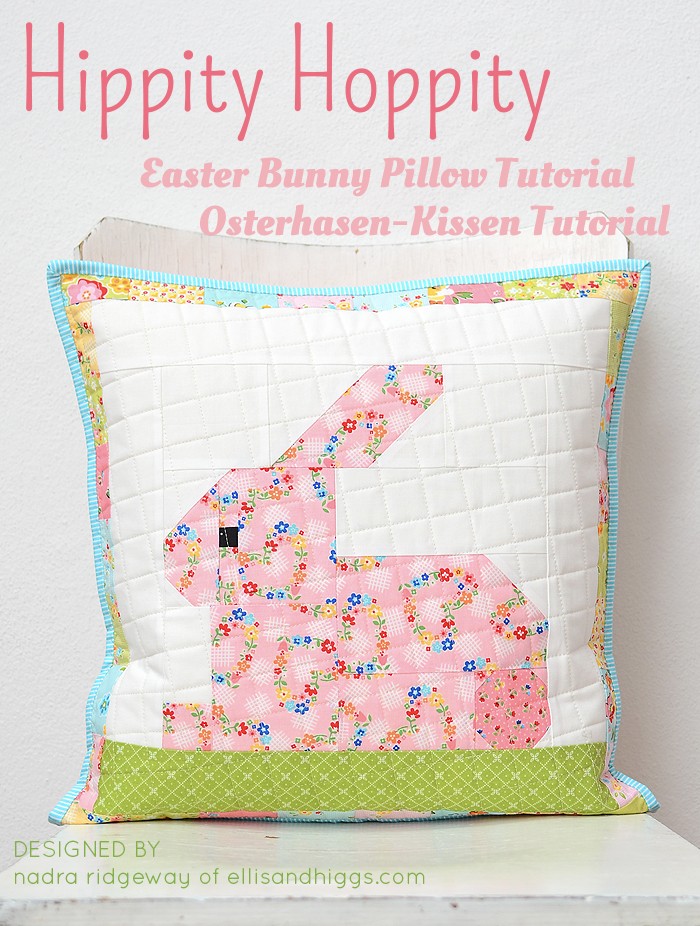
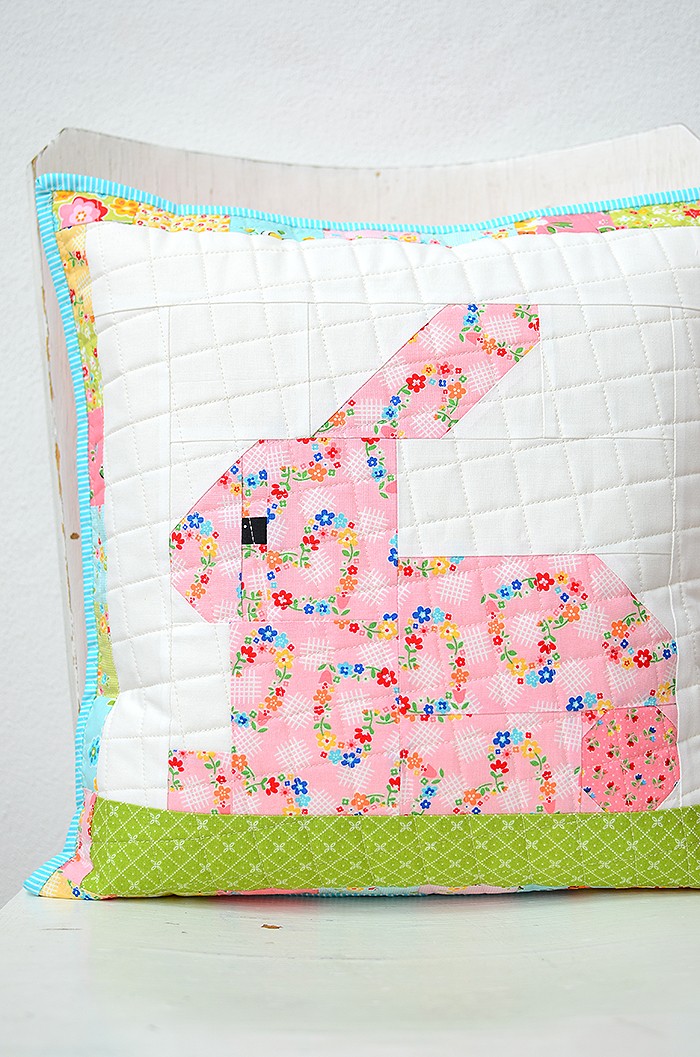
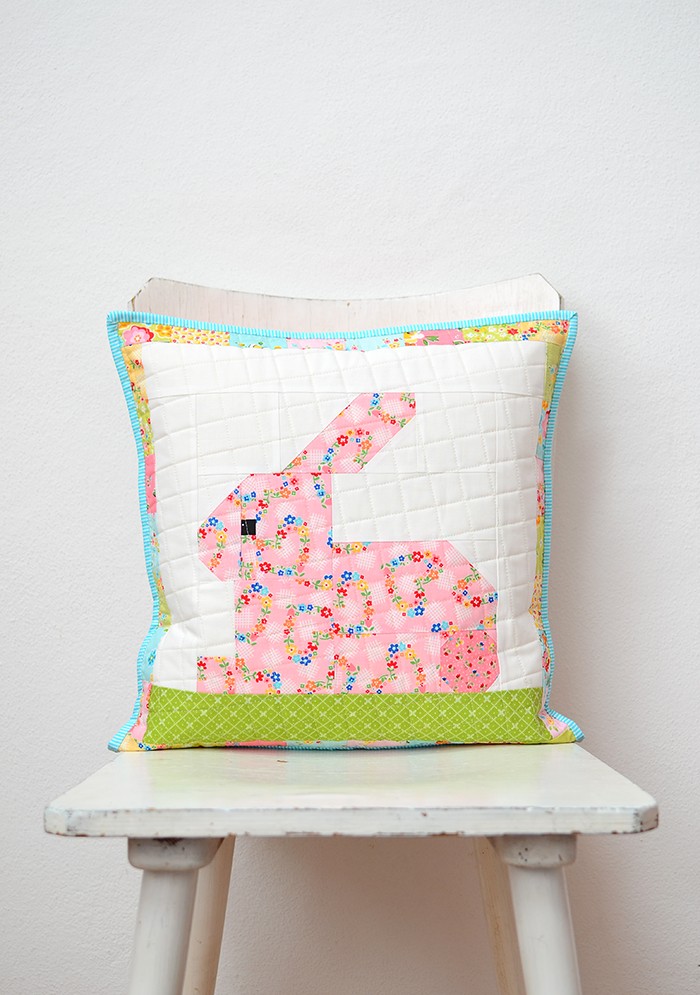
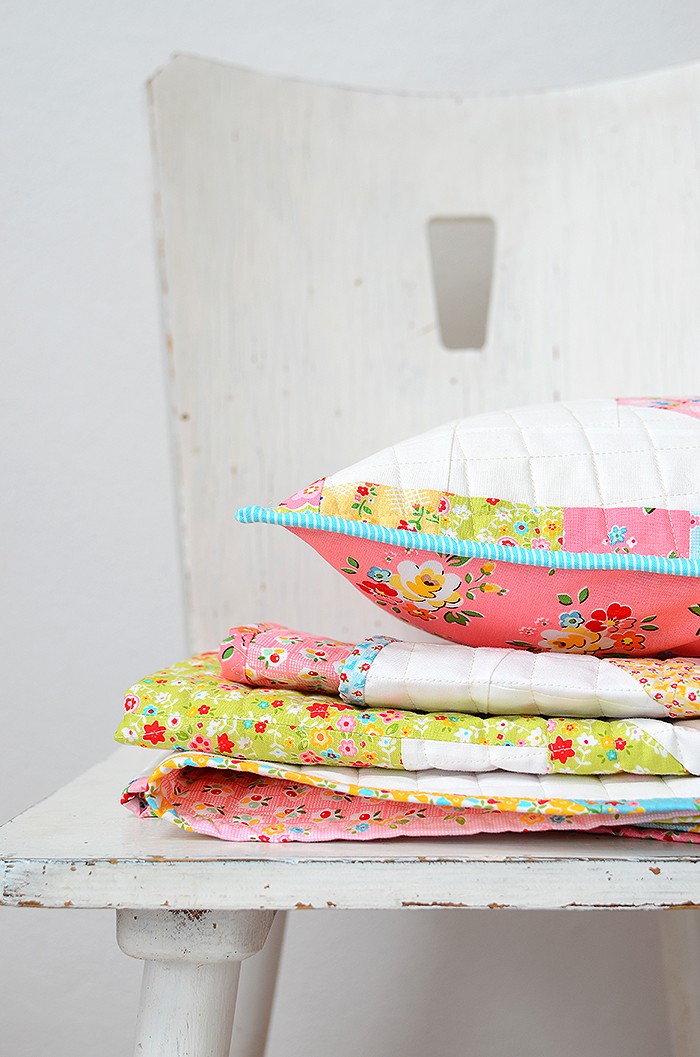
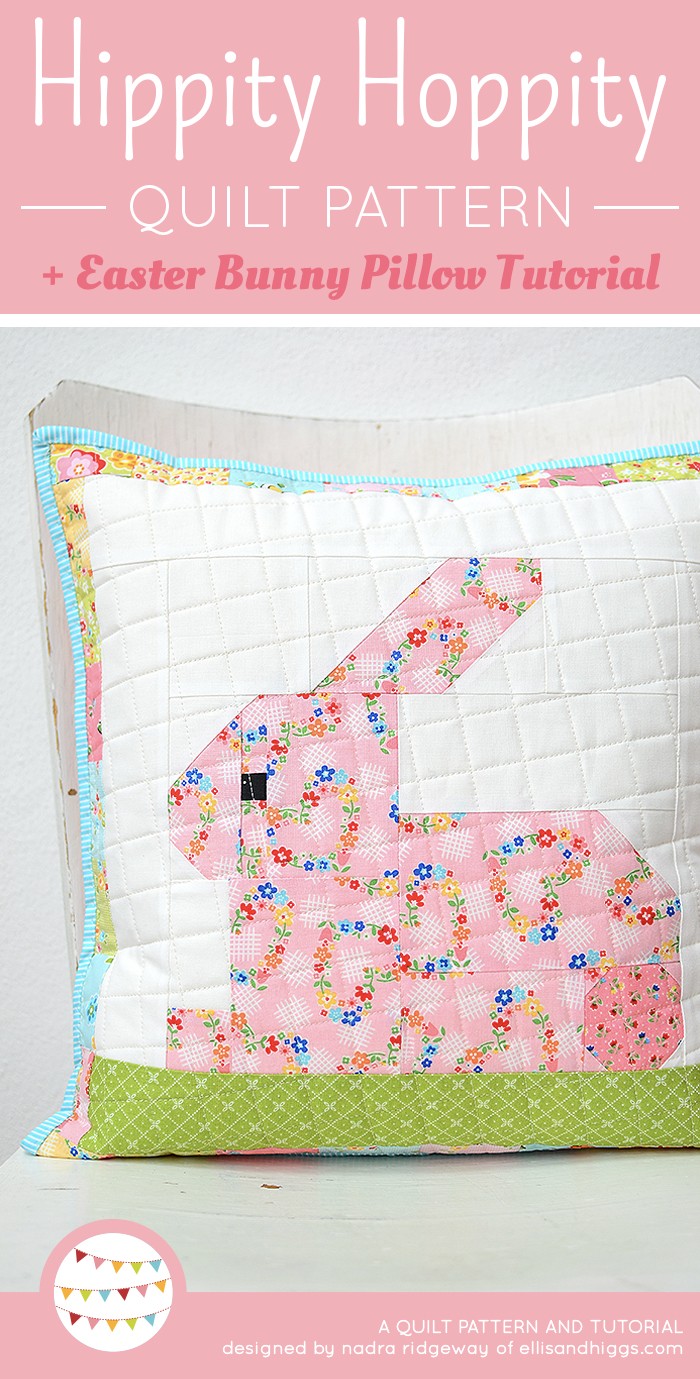
This is the Easter Bunny Pillow I promised to provide a tutorial for! I made it using one block of the Hippity Hoppity Quilt, an Easter quilt pattern I released last week. The blocks in this quilt finish at 10″ x 10″ and are just perfect for smaller projects like table runners, place mats, mini quilts – and pillows! I hope you’ll enjoy my tutorial – let’s get started right away!
Wie versprochen zeige ich dir heute in einem Tutorial, wie du aus einem der Hasen Quilt Blöcke meines kürzlich erschienenen Hippity Hoppity Quilts ein zauberhaftes Kissen mit scrappy Umrandung nähst! Diese Patchworkdecke für Babys besteht aus 12 Blöcken mit einer fertigen Größe von 10″ x 10″, die sich für Ostern und alle anderen Gelegenheiten perfekt in kleinere Projekte wie Tischläufer, Platzdecken, Mini Quilts – oder eben Kissen verwandeln lassen. Ich halte mich kurz und lege direkt los – viel Spaß!! :)
Hippity Hoppity Easter Bunny Pillow Tutorial
Materials / Materialien:
- (1) Hippity Hoppity Bunny Quilt Block
The pattern is available here / Die Anleitung ist hier erhältlich: → Hippity Hoppity Quilt Pattern - Border fabric / Stoff für die Umrandung:
(8) 2 ½“ x 4 ½“ (A), 2 pink, yellow, green and blue pieces each / jeweils 2 x rosa, gelb, grün, blau
(2) 2 ½“ x 3″ (B), each one pink, green and blue piece / jeweils 1 x rosa, grün und blau - Grass Fabric / Stoff für das Gras
(1) 2 ½“ x 14 ½“ (C) - Background Fabric / Hintergrundstoff
(2) 2 ½“ x 10 ½“ (D)
(1) 2 ½“ x 14 ½“ (E) - Backing Fabric / Stoff für die Rückseite
(1) 18″ x 18″ - Batting / Vlieseinlage
(1) 18″ x 18″ - Pillow Backing / Stoff für den Hotelverschluss
(2) 16 ½“ x 11 ½“ - Binding Fabric / Stoff für die Einfassung
(2) 2 ¼“ x WOF / Stoffbreite - (1) 16″ x 16″ pillow form / Kissenfüllung
Assembling the scrappy border
Scrappy Umrandung zusammensetzen
Please read all intsructions before you begin. Use a ¼“ seam allowance and press the seams as shown by arrows.
Bitte lies dir alle Schritte einmal durch, bevor du beginnst. Die Nahtzugabe von ¼“ wird in Richtung der angezeigten Pfeile gebügelt.
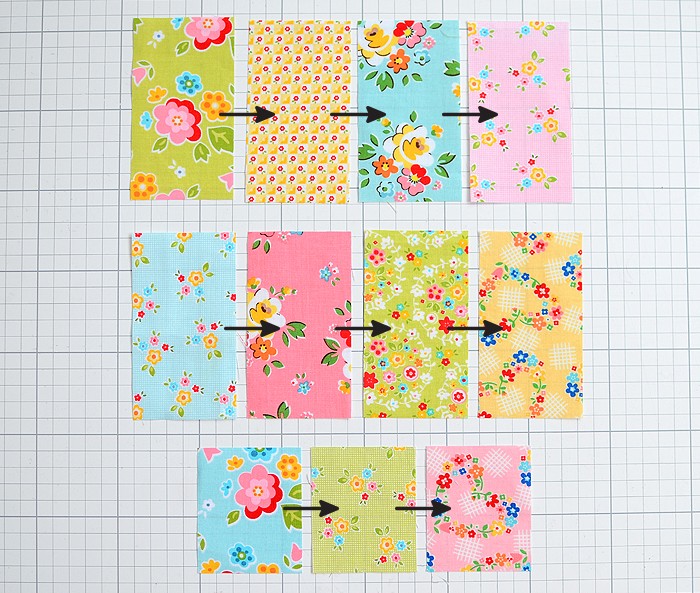
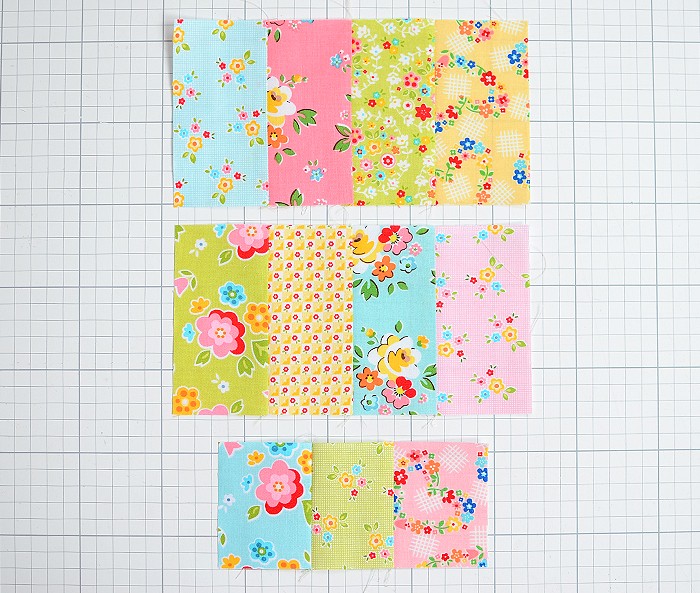
1. Sew together each four Fabric A rectangles and the three Fabric B pieces as shown above.
1. Jeweils vier A Rechtecke und die drei B Rechtecke wie oben dargestellt zusammennähen.
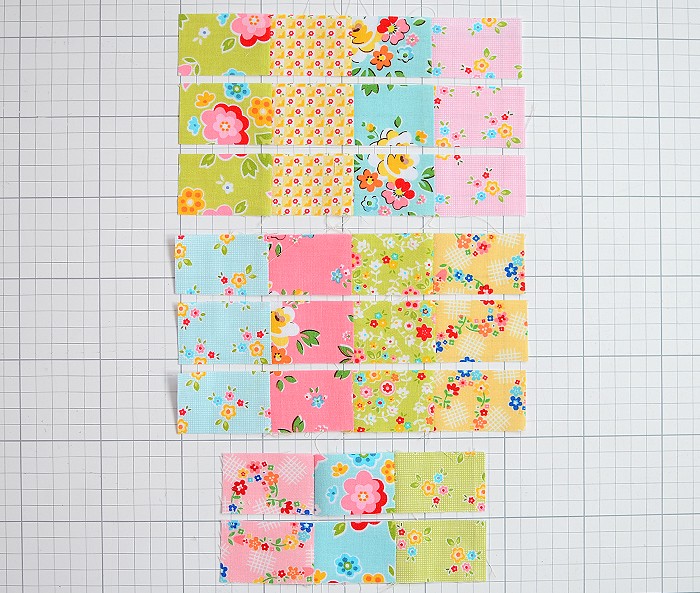
2. Sub cut the Fabric A units into each (3) 1 ½“ x 8 ½“ pieces and the Fabric B unit into (2) 1 ½“ x 6 ½“ pieces.
2. Die A Einheiten in jeweils (3) 1 ½“ x 8 ½“ Stücke, und die B Einheit in (2) 1 ½“ x 6 ½“ Stücke unterteilen.
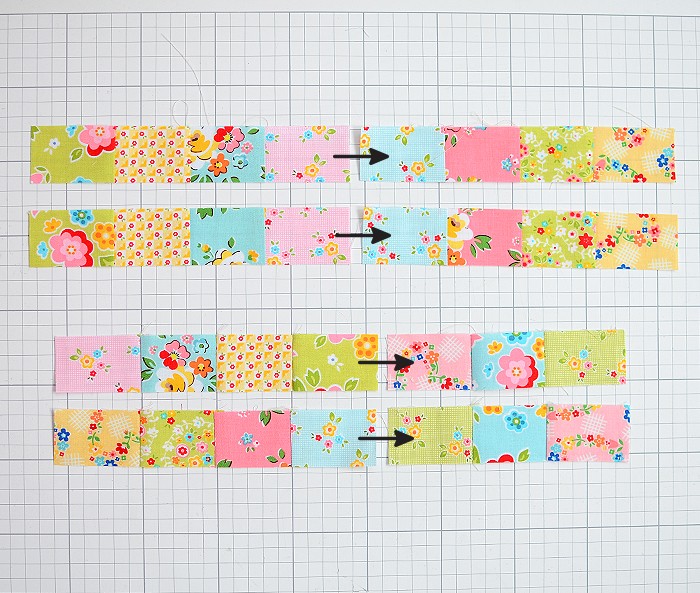
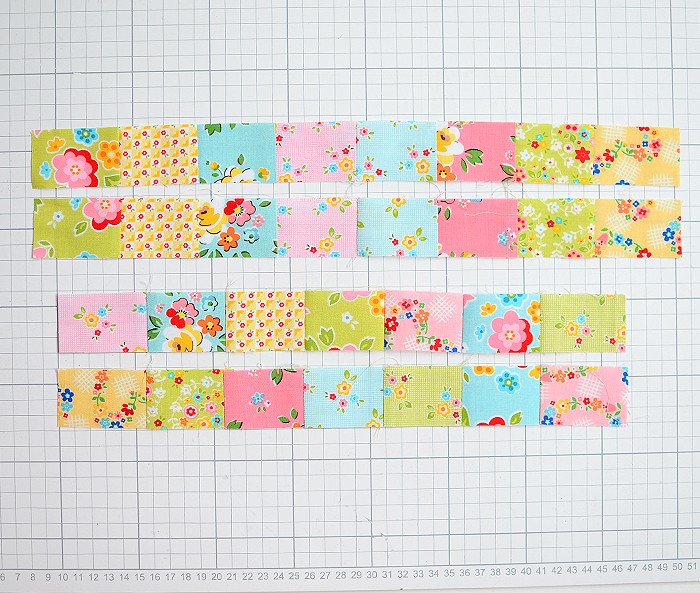
3. Pair up the pieces and sew them together as shown above:
– Assemble two Fabric A pieces. The large border unit should measure 1 ½“ x 16 ½“. Repeat and make two.
– Assemble one Fabric A piece and one Fabric B piece. The small border unit should measure 1 ½“ x 14 ½“. Repeat and make two.
3. Die Stücke wir oben dargestellt paaren und zusammennähen::
– Zwei A Stücke zusammennähen. Die große Umrandungs-Einheit sollte 1 ½“ x 16 ½“messen. Wiederholen und eine zweite Einheit herstellen.
– Ein A Stück und ein B Stück zusammennähen. Die kleine Umrandungs-Einheit sollte 1 ½“ x 14 ½“ messen. Wiederholen und eine zweite Einheit herstellen.
Assembling the pillow top
Kissenvorderseite zusammensetzen
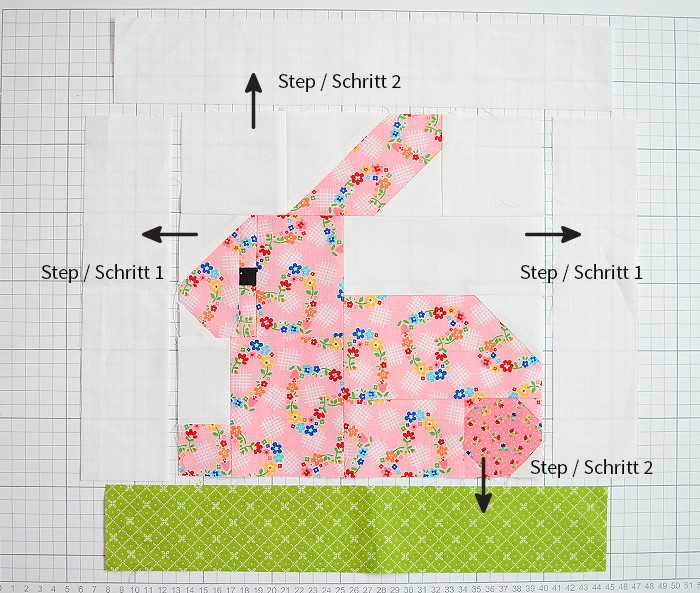
4. Sew each one Fabric D rectangle to the left and right side of the Hippity Hoppity quilt block. Next sew the Fabric E rectangle to the top and the Fabric C rectangle to the bottom of the partial pillow center . The pillow center should measure 14 ½“ x 14 ½“.
4. Jeweils ein D Rechteck and die rechte und die linke Seite des Hippity Hoppity Quilt Blocks nähen. Anschließend das E Rechteck an die obere Seite und das C Rechteck an die untere Seite der Teileinheit nähen. Die Kissenmitte sollte 14 ½“ x 14 ½“ messen.
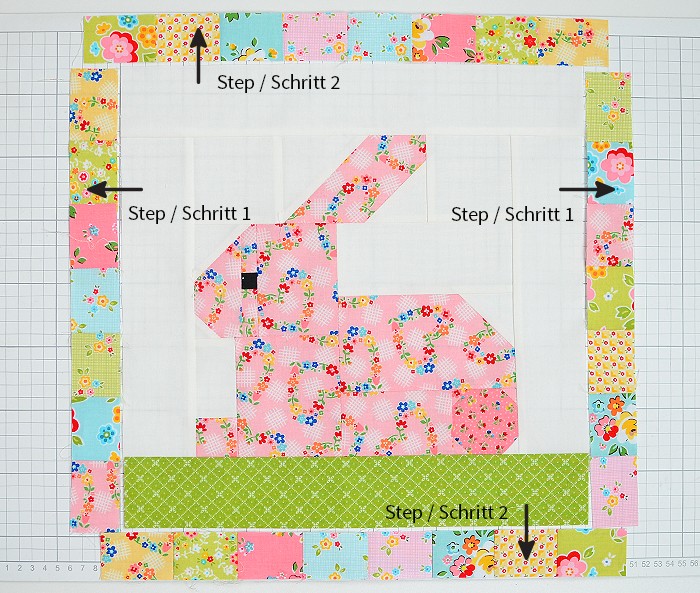
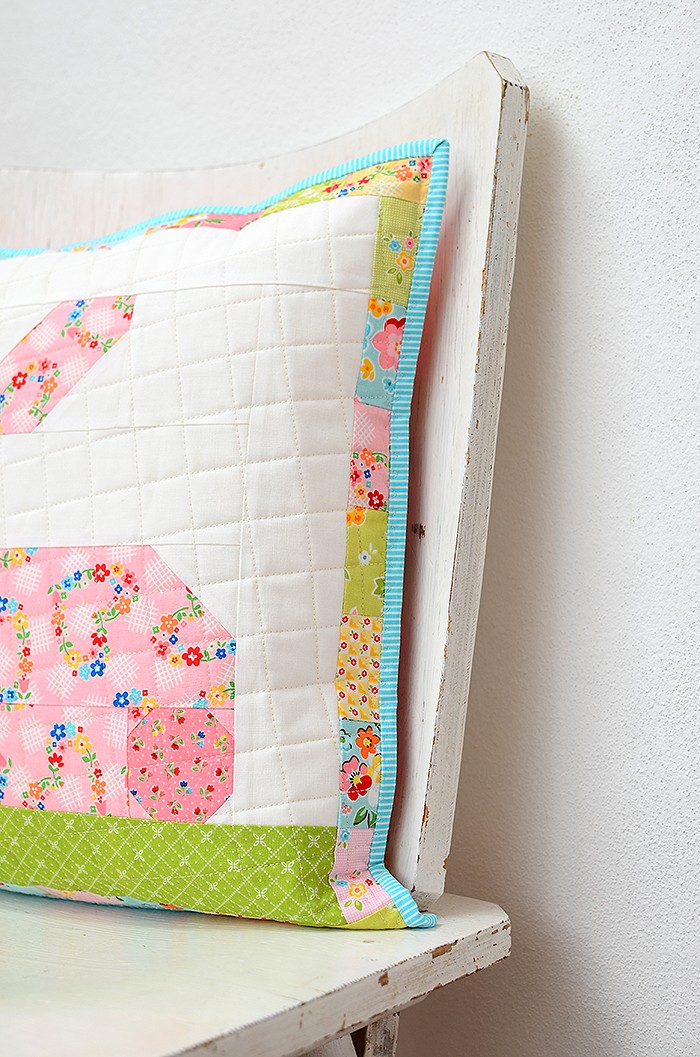
5. Next assemble the Border Units: sew each one small border unit to the left and the right side of the pillow center and each one large border unit to the top and the button of the partial pillow top. Your pillow top should measure 16 ½“ x 16 ½“.
5. Als nächstes wird die Umrandung angenäht: jeweils eine kleine Umrandungs-Einheit an die rechte und die linke Seite der Kissenmitte nähen. Anschließend jeweils eine große Umrandungs-Einheit an die obere und die untere Seite der Einheit nähen. Die Kissenvorderseite sollte 16 ½“ x 16 ½“ messen.
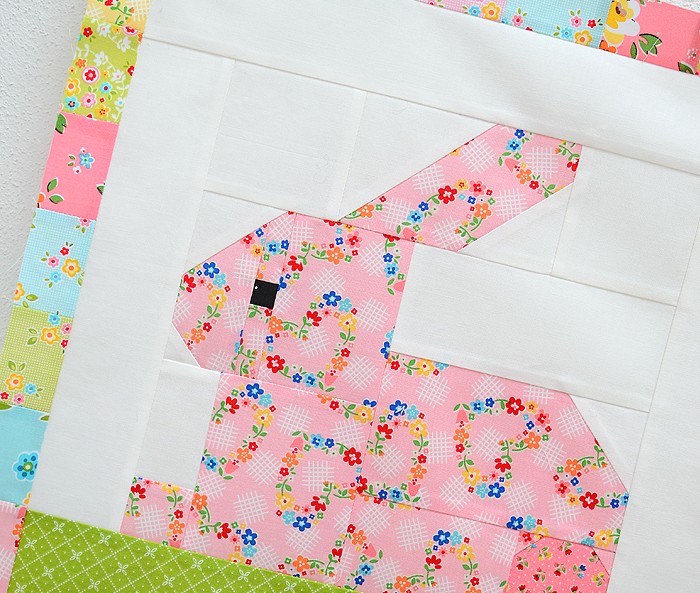
This is how your pillow top should look.
So sollte deine Kissenvorderseite jetzt aussehen.
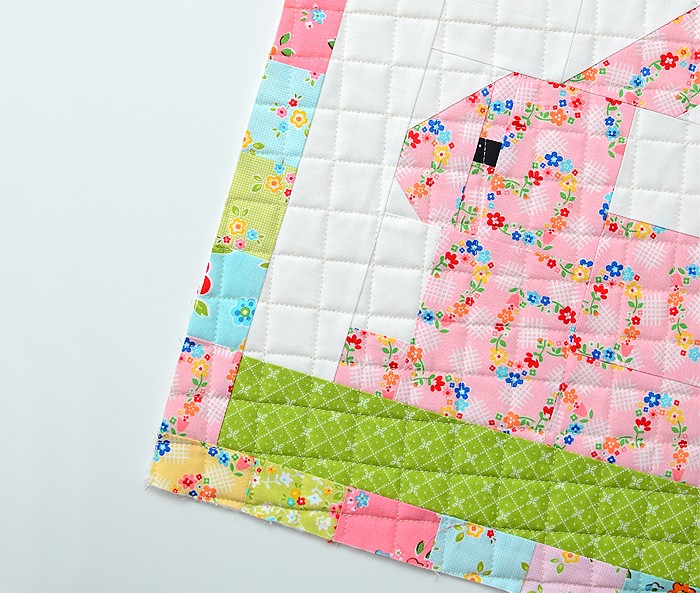
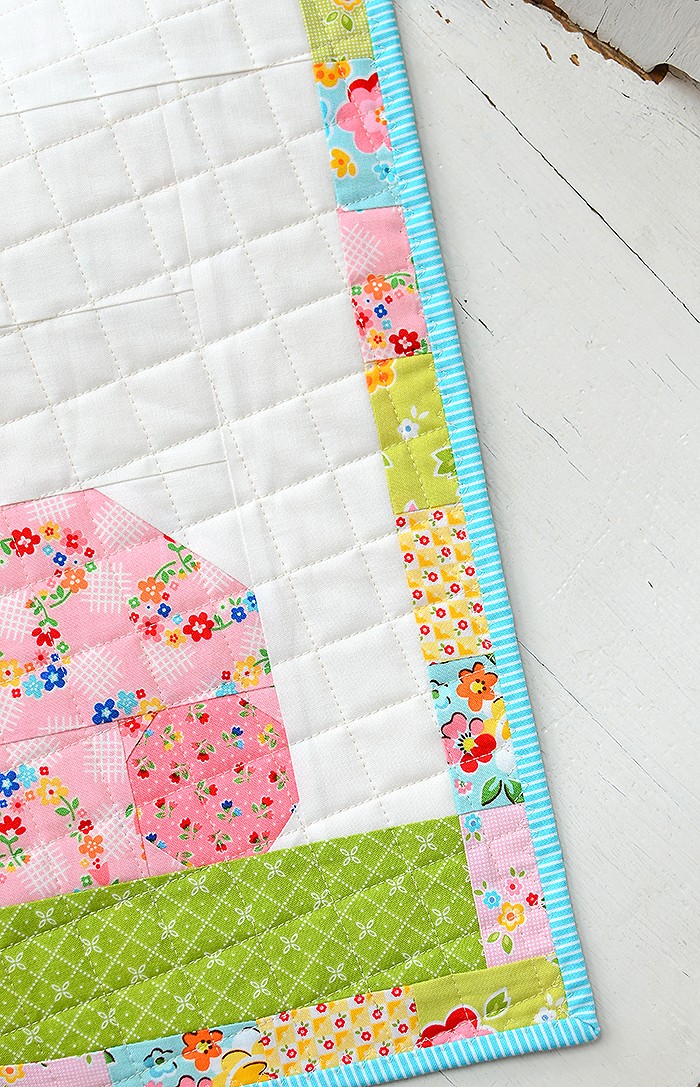
6. Now make a quilt sandwich with your pillow top, batting and backing fabric and quilt as desired. Trim off the excess batting and fabric. I quilted my pillow top with a slightly angled 1″ square grid and I love how it turned out!
6. Ein Quiltsandwich aus Kissenvorderseite, Vlieseinlage und Rückseitenstoff herstellen und nach belieben quilten. Ich habe ein leicht geneigtes 1″ Quadrat-Gittermuster verwendet und finde es passt super!
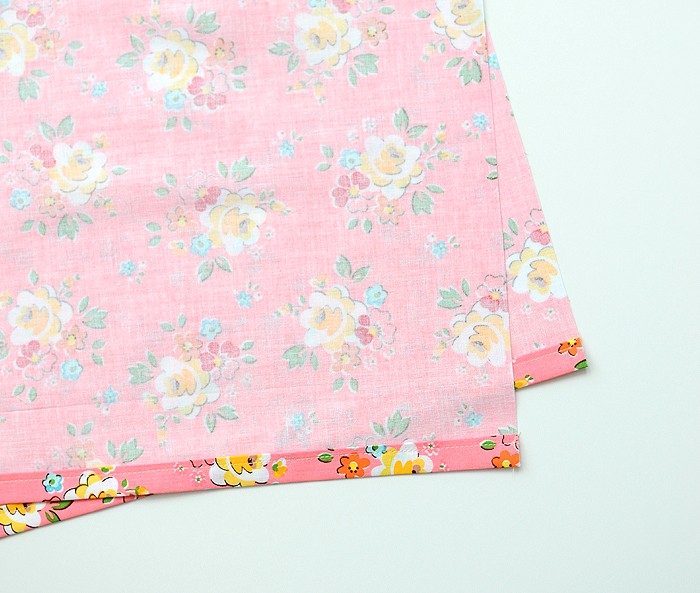
7. Next take one of the pillow backing pieces and place it wrong side up. Fold over the long edge ½“ twice, press and stitch in place. The pillow backing piece should measure 16 ½“ x 10 ½“. Repeat and make two.
7. Als nächstes eines der Stoffstücke für den Hotelverschluss mit der linken Seite nach oben platzieren. Die lange Seite zwei mal ½“ umklappen, bügeln und mit einer geraden Naht absteppen. Die Hotelverschluss-Einheit sollte 16 ½“ x 10 ½“ messen. Wiederholen und zwei Hotelverschluss-Einheiten herstellen.
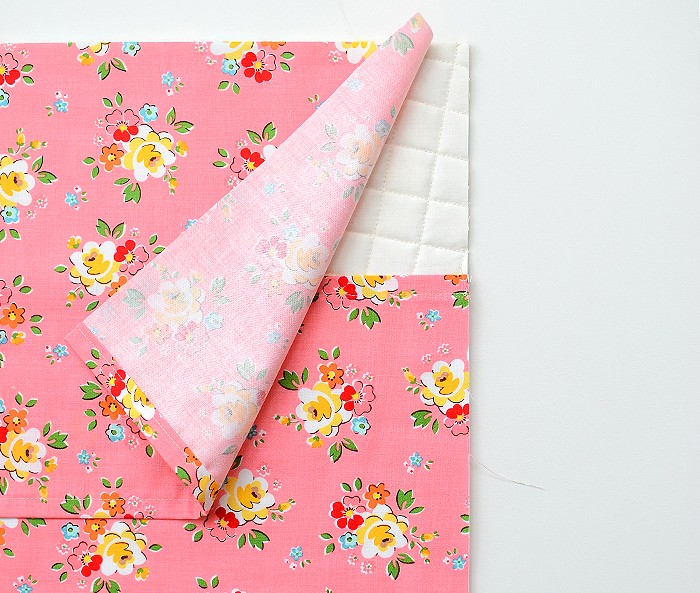
8. Align the backing pieces, right sides up and raw edges aligned, with the back of the pillow top as shown above. The top piece should overlap the bottom piece by 4 ½“.
8. Kissenvorderseite und Hotelverschluss-Einheiten wie oben dargestellt links auf links aufeinanderlegen und ausrichten. Die obere Hotelverschluss-Einheit sollte die Untere um 4 ½“ überlappen.
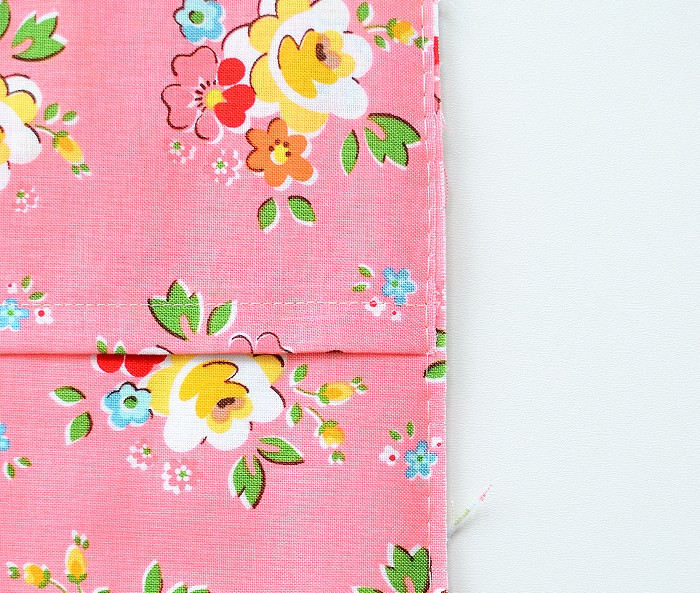
9. Pin the backing in place and machine baste ⅛“ from the edge. Next piece the binding strips end to end and bind the pillow using your favorite binding method. Here you will find an illustrated step-by-step tutorial on how to attach the binding: → How to finish a quilt
9. Mit Stecknadeln feststecken und einmal rundherum knappkantig mit einem geraden Stich heften. Anschließend aus den Streifen für die Einfassung einen zusammenhängenden Streifen herstellen und das Kissen nach Wunsch einfassen: → Einen Quilt fertigstellen

Insert the pillow form and enjoy your Easter bunny pillow!
Jetzt noch das Kissen mit der Füllung versehen und dich daran erfreuen!
I hope you enjoyed my Easter bunny pillow tutorial! By the way: you can use the instructions for this scrappy border on every 14 ½“ x 14 ½“ quilt block!
I’ll be back with my next Patchwork & Quilting Basics series post which is all about quilting fabrics, very soon!
xoxo Nadra
Ich hoffe es hat dir Spaß gemacht! Diese Anleitung für eine scrappy Umrandung kannst du übrigens für jeden Quilt Block mit der Größe von 14 ½“ x 14 ½“ verwenden!
Wir sehen uns ganz bald wieder mit dem nächsten Teil meiner Patchwork & Quilting Basics Serie, in dem es um Patchwork-Stoffe geht! Bis dahin liebe Grüße von
Nadra



Liebe Nadra,
Oh, wie wunder wunder wunder schöööön!!!
Dein Tutorial ist richtig klasse. Danke fürs Zeigen!
Viele, liebe Grüße,
Annette
Ich danke dir vielmals und sehr gerne! :))
Thank you very much for this free pattern. It is so pretty and I look forward to making it in the future.
Nadra, you continue to impress the Quilting World, with your creative patterns and lovely fabrics. I appreciate all your beautiful work! Thank you for all you give and for sharing your work!