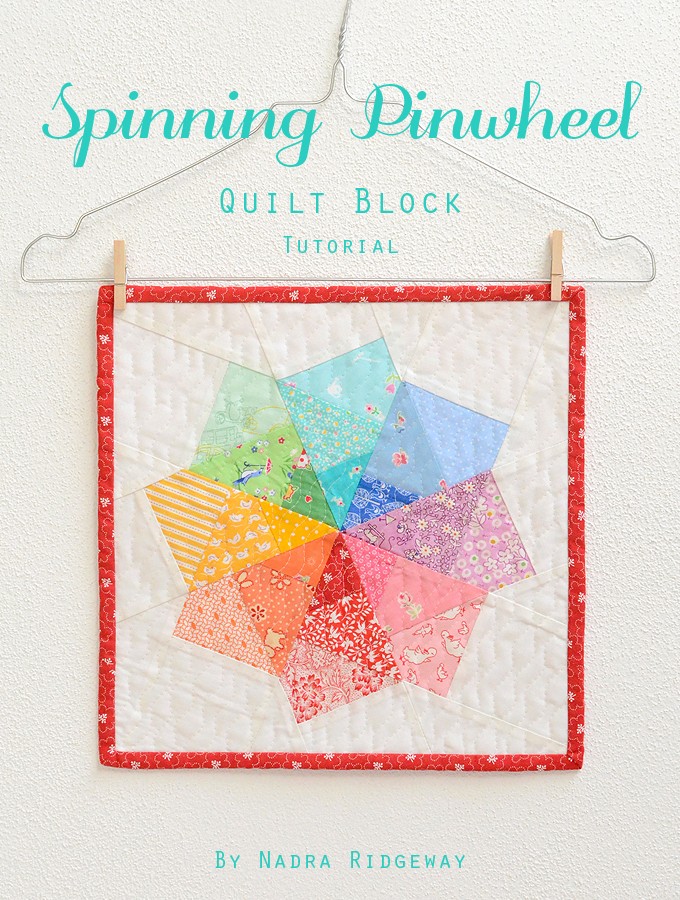
Wie man einen Quilt Block paper pieced… How to paper piece a quilt block…
MATERIALIEN
Schnittmuster hier herunterladen
24 Stoffstücke, ca. 10 x 15 cm groß
1 Fat Quarter (45 x 55 cm) weißer Baumwollstoff
Transparentes Zeichenpapier
Stecknadeln
Fertige Block Größe: 12″ (30,5 cm)
MATERIALS
Download pattern here
24 scraps, approx. 4″ x 6″
1 fat quarter white cotton fabric
Transparent drawing paper
Sewing Pins
Finished block size: 12″
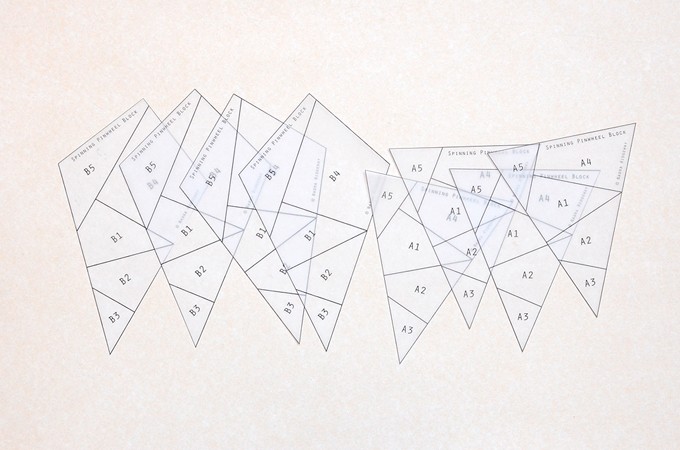
Zum Ausdrucken des Schnittmusters habe ich transparentes Zeichenpapier verwendet. Das ist mit 90g/m2 etwas schwerer und stabiler und man kann gut hindurchsehen. Viele verwenden gerne Freezer Paper, das sich aufbügeln und leicht wieder entfernen läßt. Wenn Ihr schon etwas geübt seid, könnt Ihr auch ganz normales Papier verwenden. Ihr müsst unbedingt sichergehen, dass in den Druckereinstellungen die Skalierung auf 100% gesetzt ist!
Der Spinning Pinwheel Block besteht aus insgesamt 8 Paper Piecing Einheiten, 4x Einheit A und 4x Einheit B. In diesem Tutorial begleite ich Euch Schritt für Schritt durch die Herstellung von Einheit B. Mit dieser Anleitung kann auch Einheit A hergestellt werden, die sich nur minimal von Einheit B unterscheidet.
Ich empfehle Euch die Stichlänge an der Nähmaschine etwas zu verkleinern (ca. 1,5). So wird das Papier beim Nähen öfter perforiert und kann später leichter entfernt werden.
I use transparent medium weight drawing paper to print out my patterns. It’s sturdy and you can easily see through. Many quilters use freezer paper. It can be ironed on fabric and removed easily. If you’re already a little experienced, regular paper will just work fine. Make sure your printer is set to ‘no scale’ or 100% before you print!
The Spinning Pinwheel Block consits of 8 paper piecing units, each 4 Units A and 4 Units B. In this tutorial I will walk you through the process of sewing Unit B step by step. The instructions apply to both Unit B and Unit A. Unit A is only slightly different than Unit B.
I recommend to set the stitch length on your sewing machine to 1.5. The close stitches will help perforate the paper and will make it easier to remove it later.
1. Zuschnittschablonen und Schnittmuster herunterladen und ausdrucken. Die Zuschnittschablonen werden jeweils 1x benötigt, Schnittteile A und B werden jeweils 4x benötigt. Die Zuschnittschablonen A/B 1, A/B 2, und A/B 3 werden sowohl für Schnittteil A als auch für Schnittteil B verwendet.
Download the pattern and the cutting templates, print and cut them out. You will need each 1 cutting template and each 4 Patterns A and 4 Patterns B. The cutting templates A/B 1, A/B 2 and A/B 3 are used for both Patterns A and B.
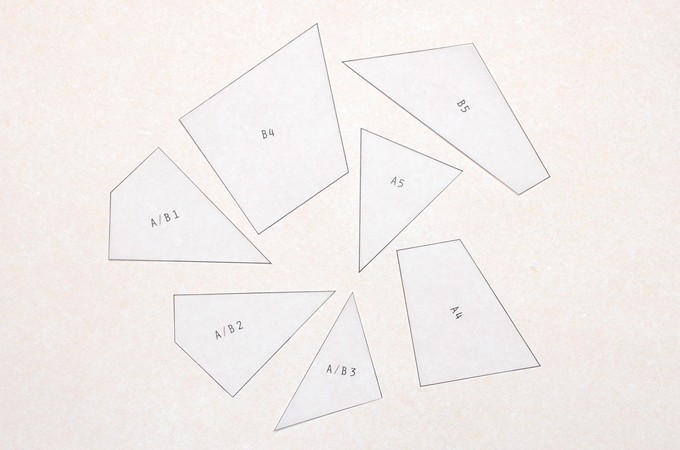
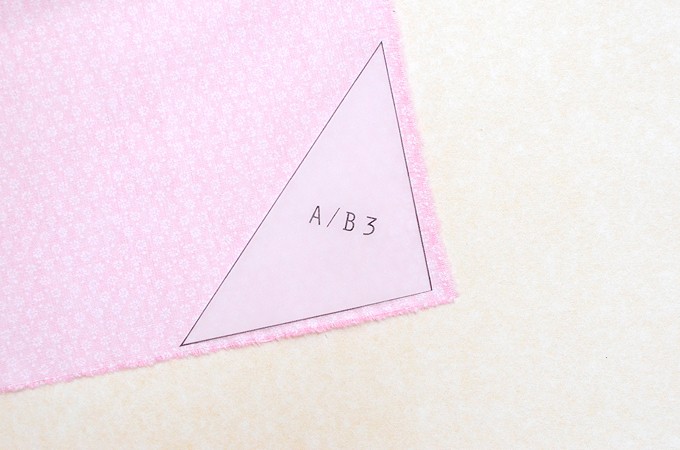
2. Stoff und Zuschnittschablone links auf links legen und zuschneiden.
Place the cutting template on the fabric with wrong sides together and cut out the fabric.
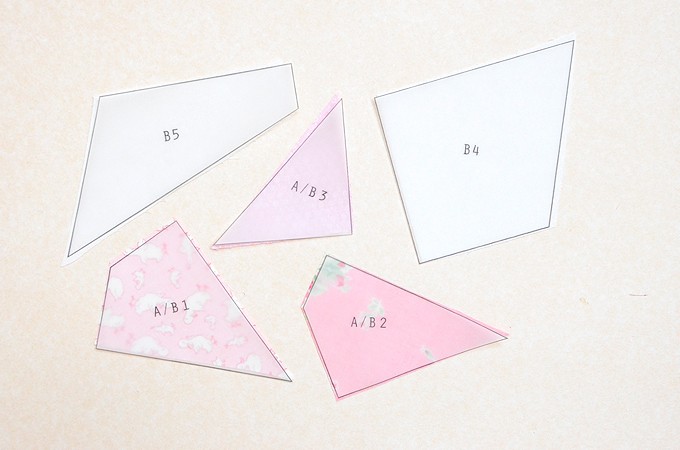
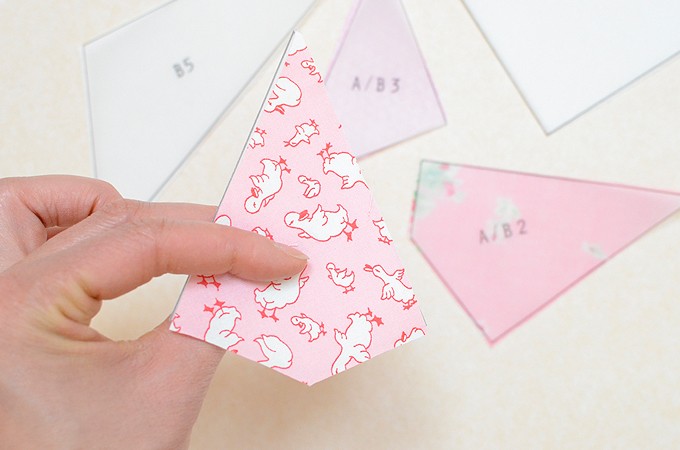
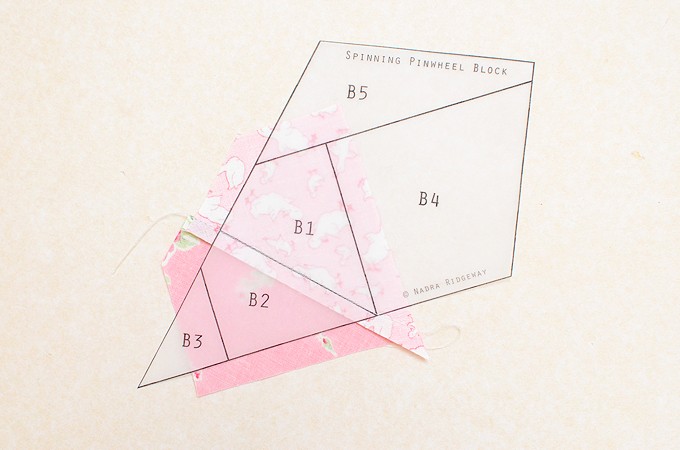
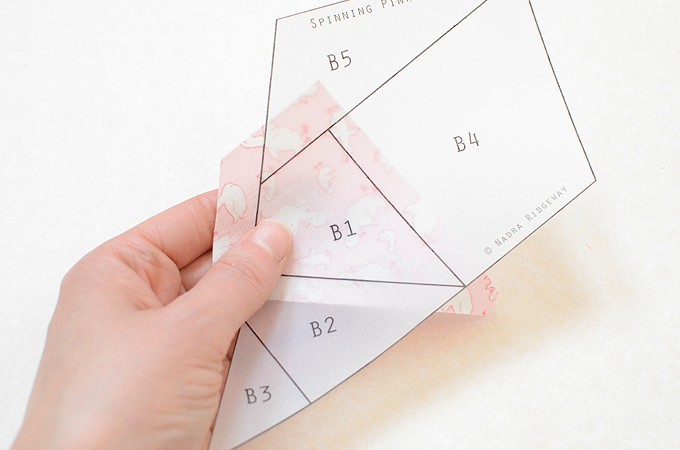
3. Stoffteil B 1 und Schnittteil B links auf links legen. Durch das transparente Papier hindurch kann das Stoffteil gut justiert werden. Die Ränder sollten möglichst gleichmäßig an allen Seiten überstehen.
With wrong sides together, layer Fabric B 1 on Pattern B. The raw edges should overlap the lines fairly evenly.
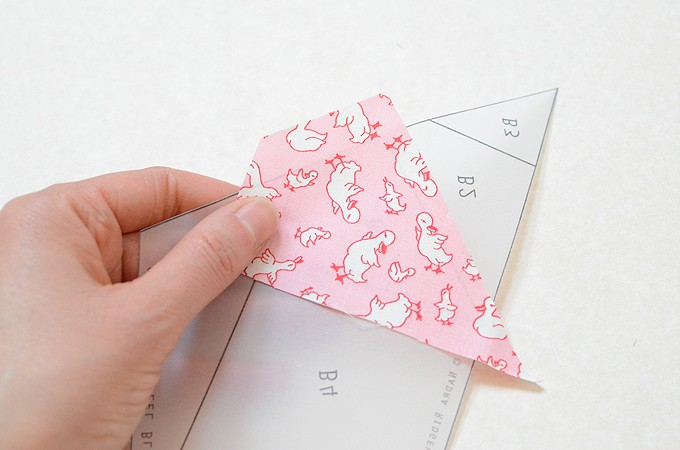
4. Um die richtige Position zu finden, Stoffteil B 2 anhalten und justieren. Auch hier gilt: die Ränder sollten möglichst gleichmäßig überstehen.
To find the right position, hold Fabric B 2 against the pattern and adjust. Again: The raw edges should overlap the lines fairly evenly.
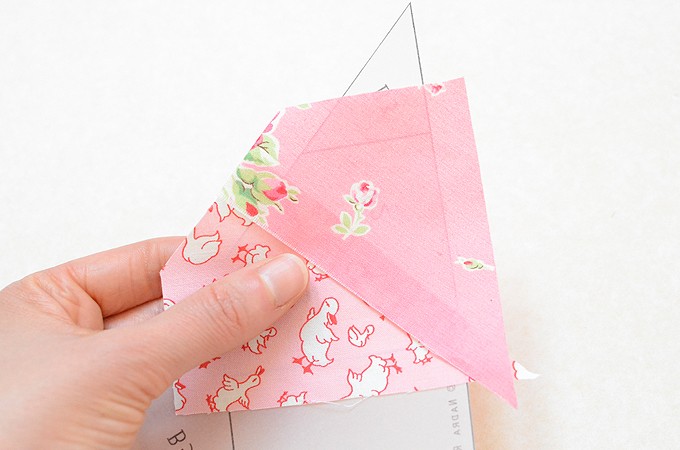
5. Stoffteil B 2 wenden. Stoffteile B 2 und B 1 liegen jetzt rechts auf rechts.
Turn around Fabric B 2. Layer Fabric B 2 and Fabric B 1 with wrong sides together.
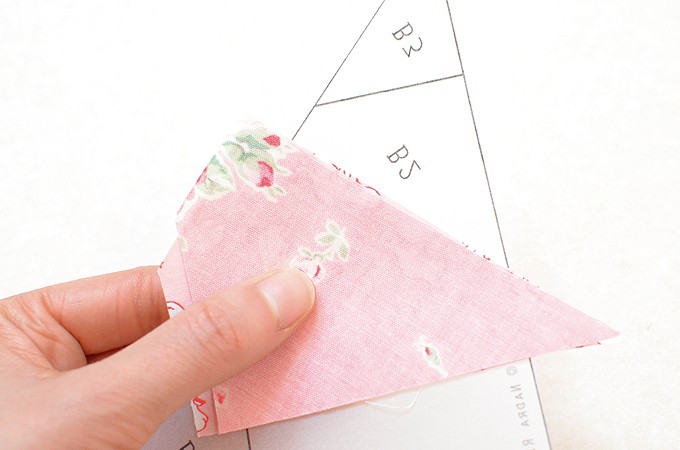
6. Mit der Stecknadel feststecken. Anschließend auf der ersten Linie entlangnähen.
Pin in place. Sew on the first line.

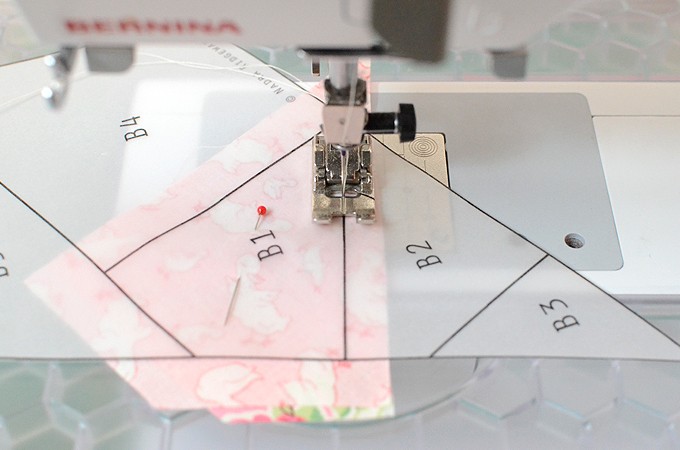
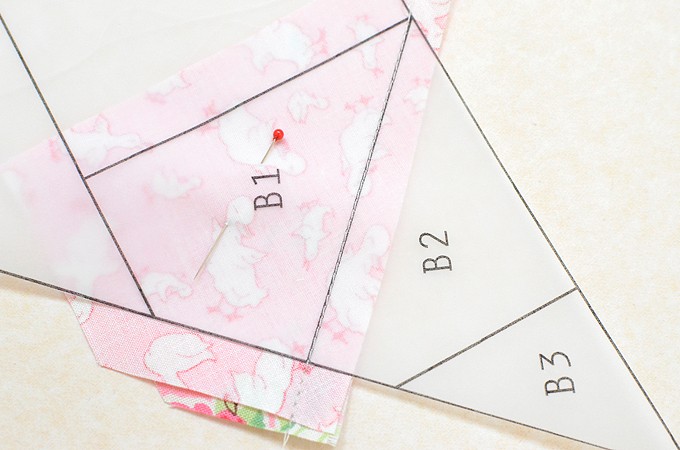
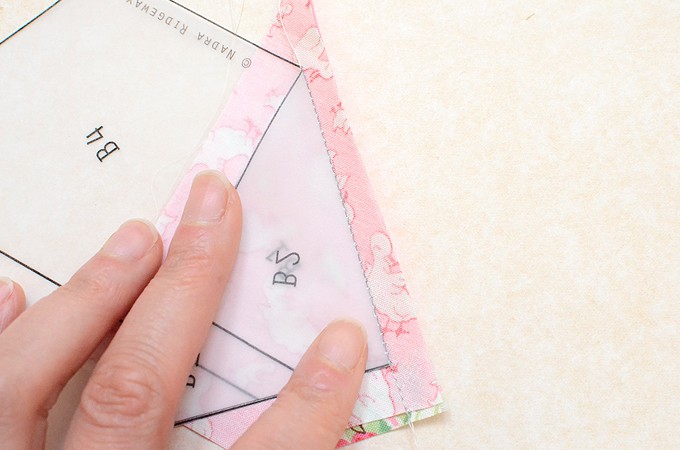
7. Schnittteil an der Naht umfalten.
Fold the paper on the line.
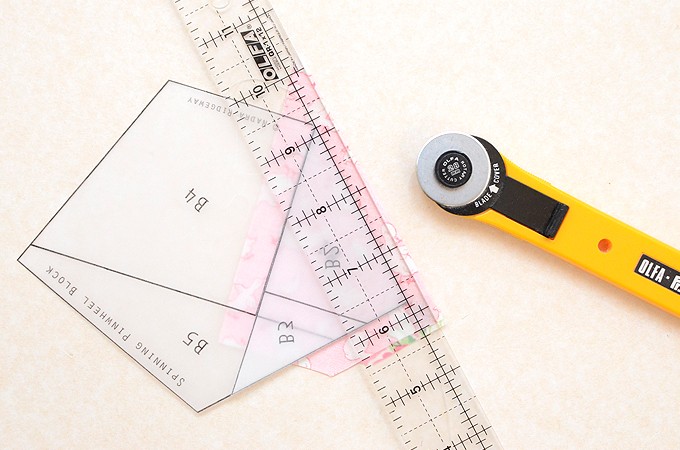
8. Nahtzugabe auf 1/4″ (0,6 cm) kürzen.
Trim the seam allowance to 1/4″.
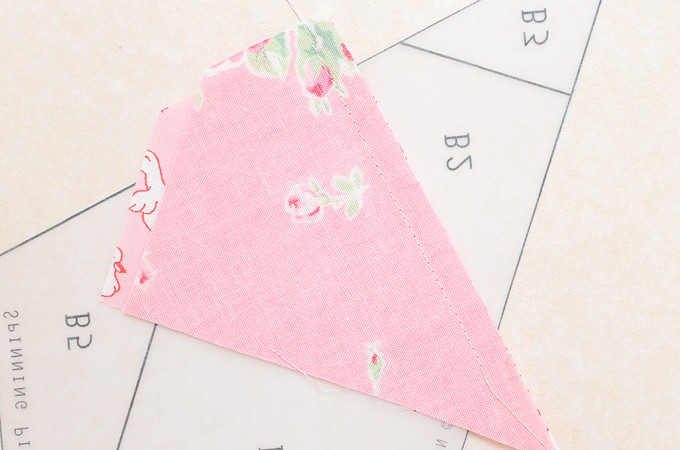
9. Anschließend bügeln.
Press afterwards.
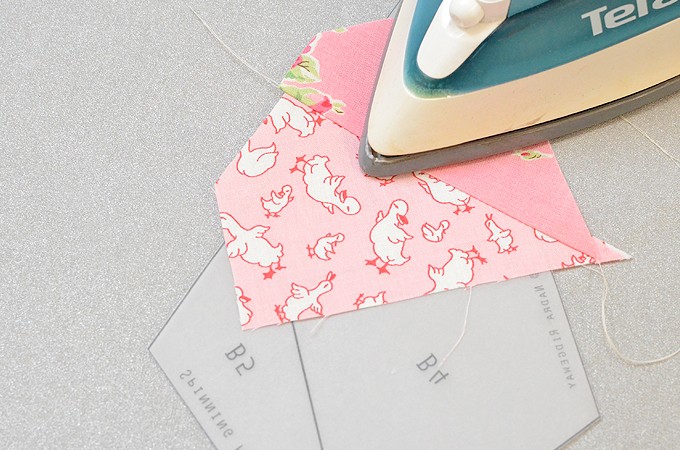
So sollte Einheit B jetzt aussehen:
Unit B should look like this:
10. Stoffteil B 3 an Stoffteil B 2 halten und justieren. Für eine bessere Sicht kann das Schnittteil auch gegen eine Lichtquelle gehalten werden. Stoffteile B 3 und B 2 liegen rechts auf rechts.
To find the right position, hold Fabric B 3 against Fabric B 2 and adjust. Hold paper and fabric up to a light source to make sure they have the right position. Layer Fabric B 3 and Fabric B 2 with wrong sides together.
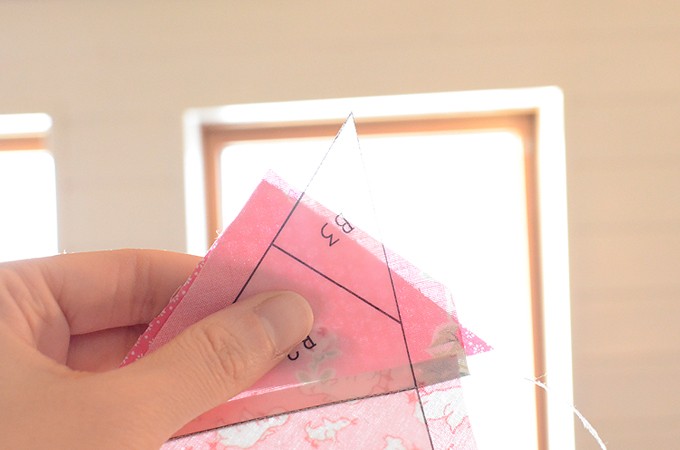
11. Mit der Stecknadel feststecken. Anschließend auf der zweiten Linie entlangnähen.
Pin in place and sew on the second line.
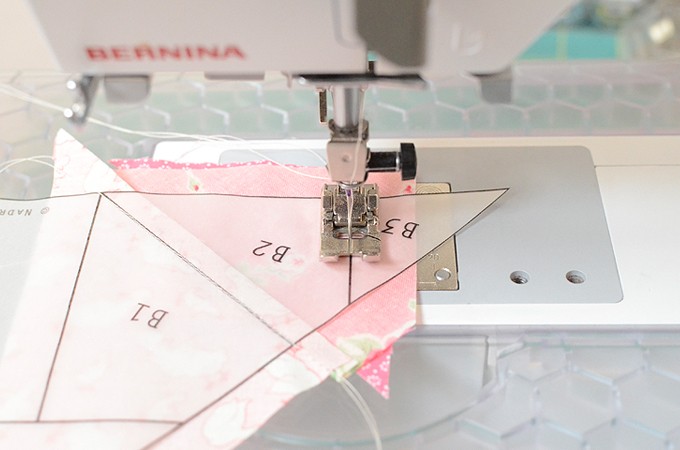
12. Schnittteil an der Naht umfalten.
Fold the paper on the line.
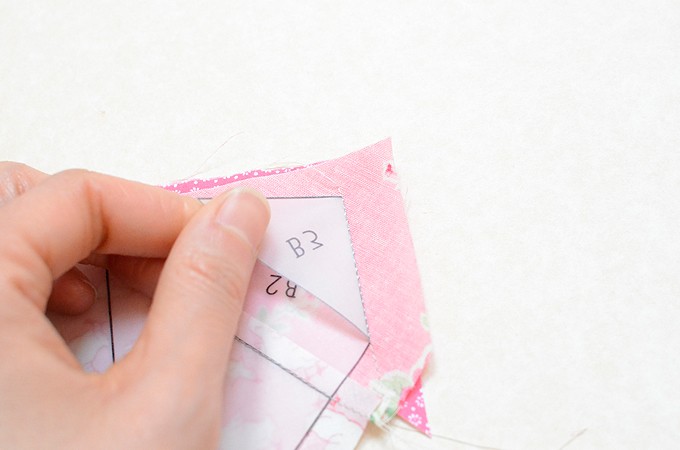
13. Nahtzugabe auf 1/4″ (0,6 cm) kürzen. Anschließend bügeln.
Trim the seam allowance to 1/4″ and press.
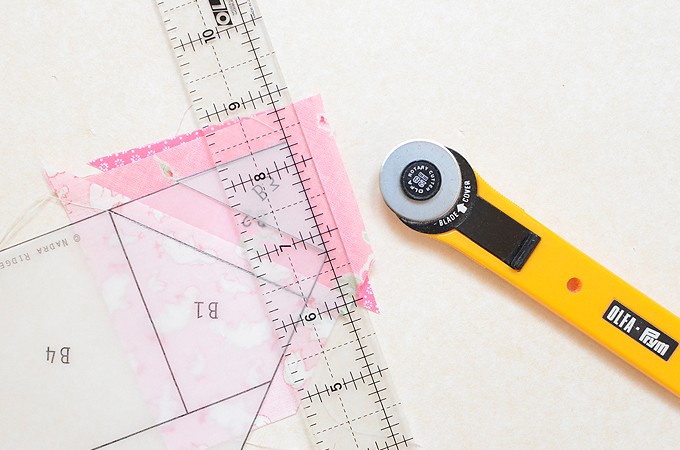
So sollte Einheit B jetzt aussehen:
Unit B should look like this:
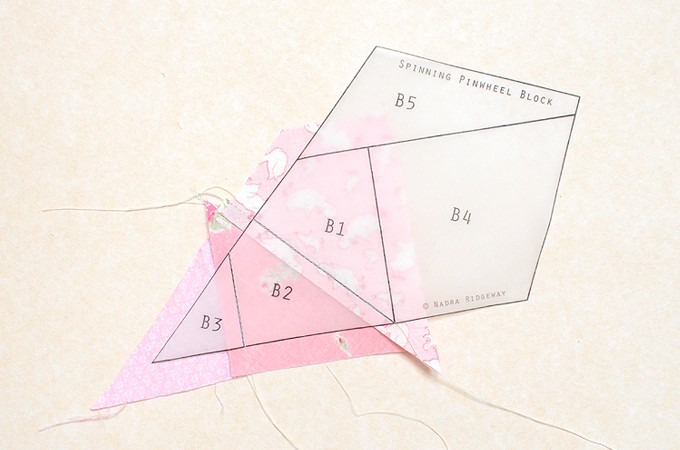
14. Stoffteil B 4 anhalten und justieren. Stoffteile B 4 und B 1 liegen rechts auf rechts.
Hold Fabric B 4 against Fabric B 1 and adjust. Layer Fabric B 4 and Fabric B 1 with wrong sides together.
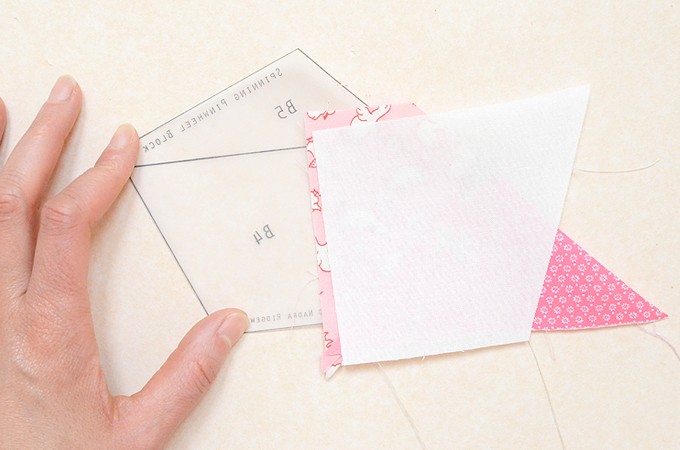
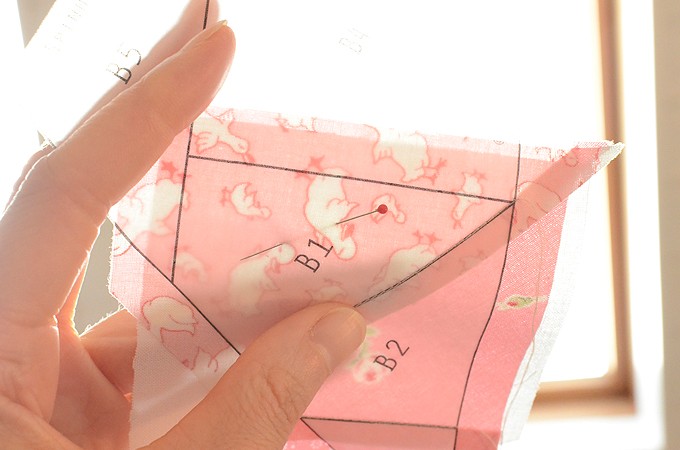
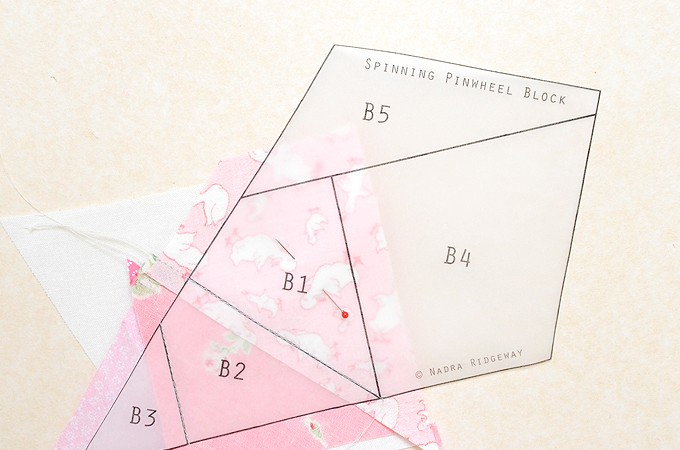
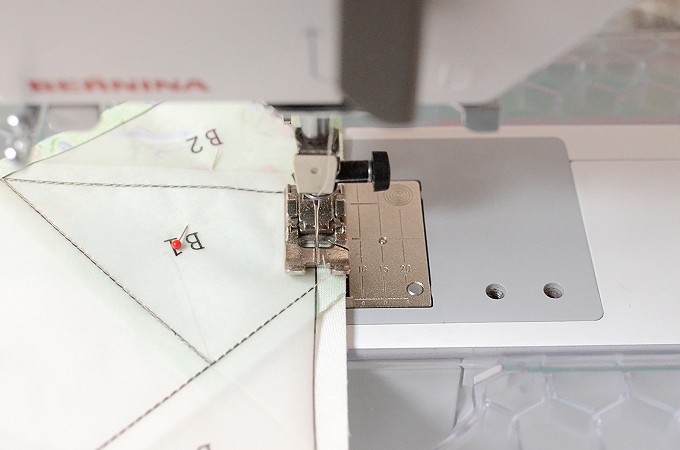
15. Mit der Stecknadel feststecken. Anschließend auf der dritten Linie entlangnähen.
ACHTUNG: Die Naht beginnt dort, wo die dritte und die vierte Linie aufeinandertreffen!
Pin in place and sew on the third line.
ATTENTION: start sewing where line three and line four meet!
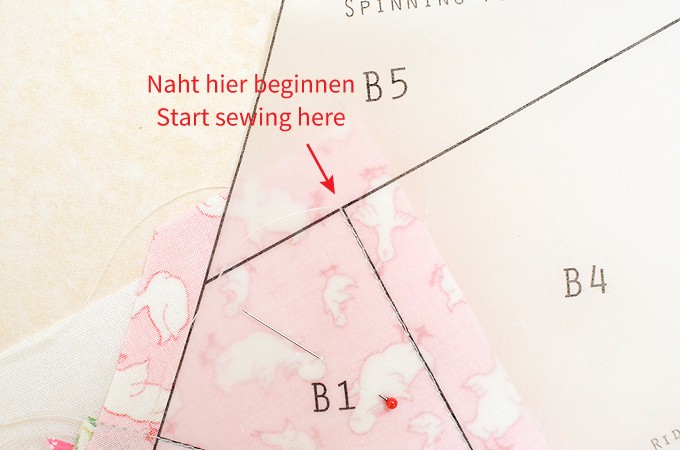
16. Schnittteil an der Naht umfalten. Nahtzugabe auf 1/4″ (0,6 cm) kürzen. Anschließend bügeln.
Fold the paper on the line, trim the seam allowance to 1/4″ and press.
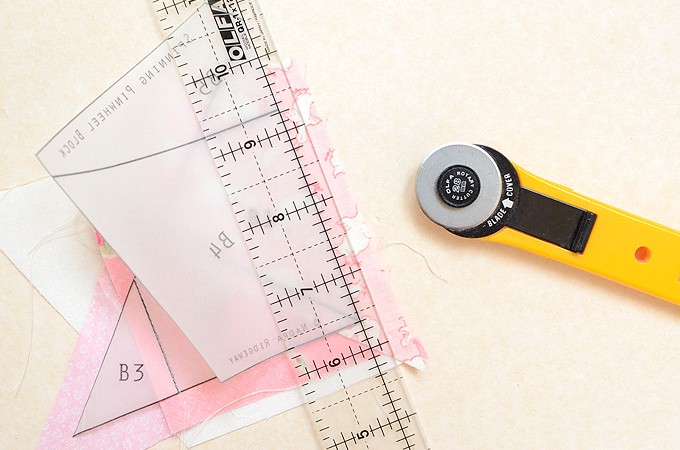
So sollte Einheit B jetzt aussehen:
Unit B should look like this:
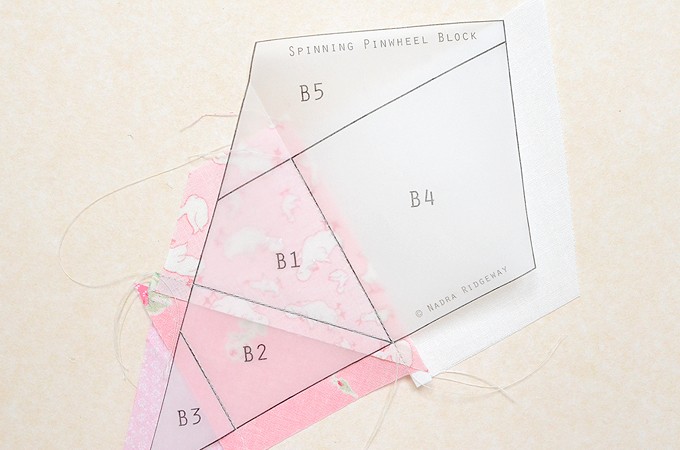
17. Stoffteil B 5 anhalten und justieren. Stoffteile B 5 und B4 liegen rechts auf rechts.
Hold Fabric B 5 against Fabric B 4 and adjust. Layer Fabric B 5 and Fabric B 4 with wrong sides together.
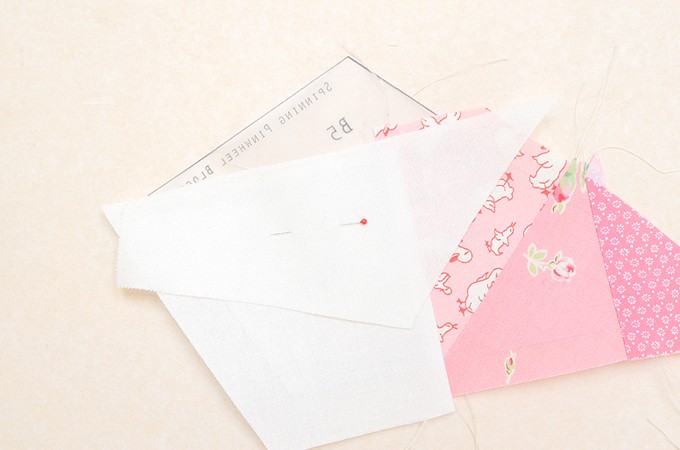
18. Mit der Stecknadel feststecken. Anschließend auf der vierten Linie entlangnähen.
Pin in place and sew on the fourth line.
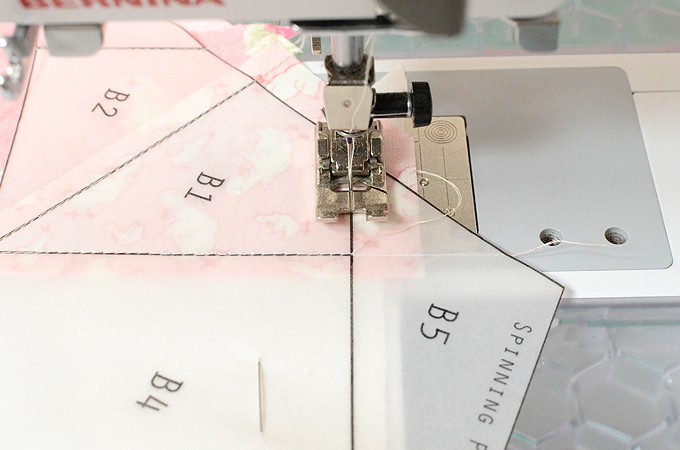
19. Schnittteil an der Naht umfalten. Nahtzugabe auf 1/4″ (0,6 cm) kürzen. Anschließend bügeln.
Fold the paper on the line, trim the seam allowance to 1/4″ and press.
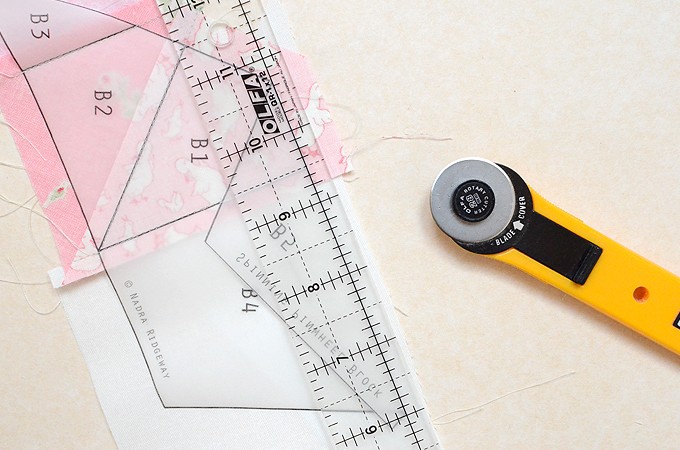
So sollte Einheit B jetzt aussehen:
Unit B should look like this:
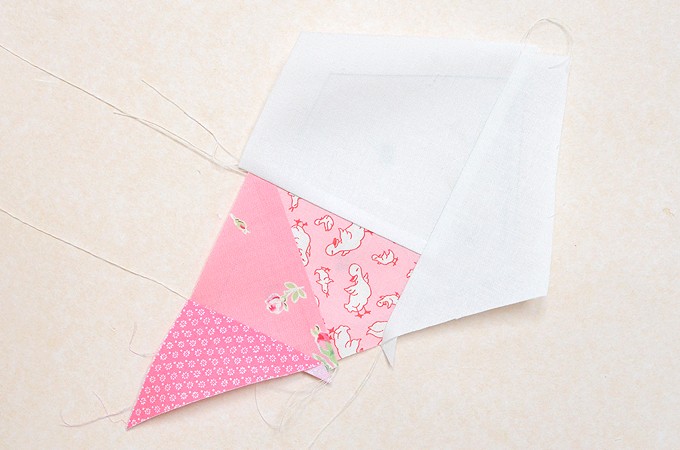
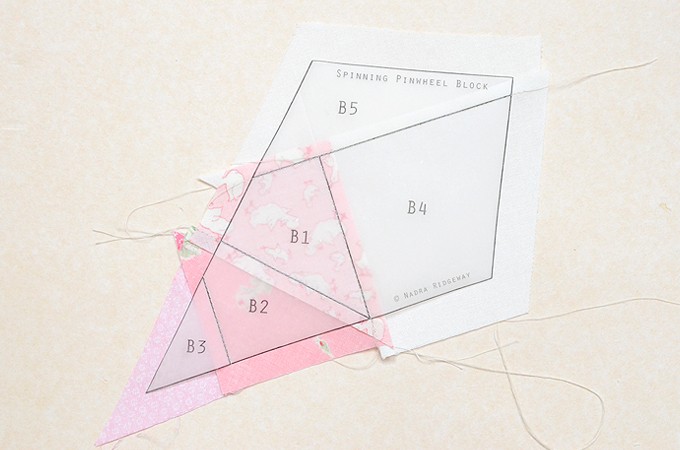
20. Die Nahtzugabe rund um Einheit B auf 1/4″ (0,6 cm) kürzen.
Trim the seam allowance of Unit B to 1/4″.
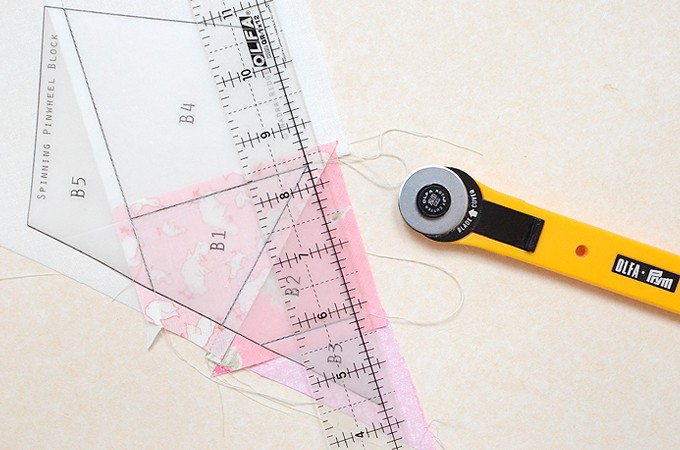
So sollte die fertige Einheit B aussehen:
The finished Unit B should look like this:
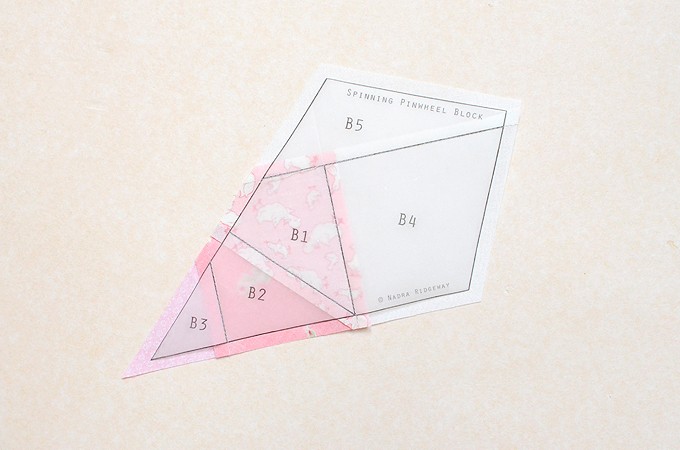
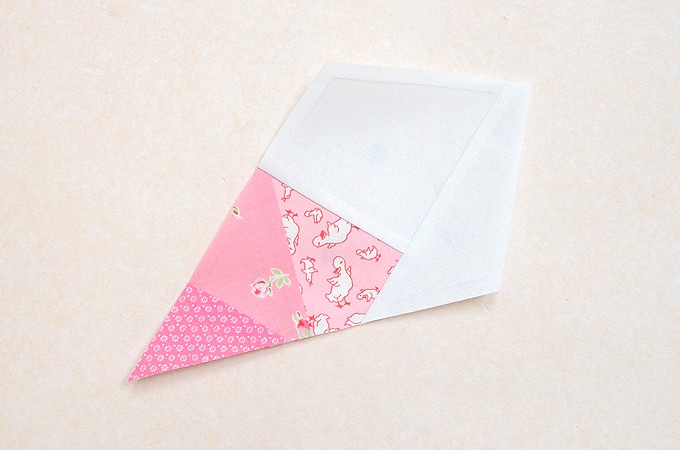
21. Die oben genannten Schritte für Einheit A wiederholen. Insgesamt vier A-Einheiten und 4 B-Einheiten herstellen.
Repeat the above steps to sew Unit A. Make each 4 Units A and 4 Units B.
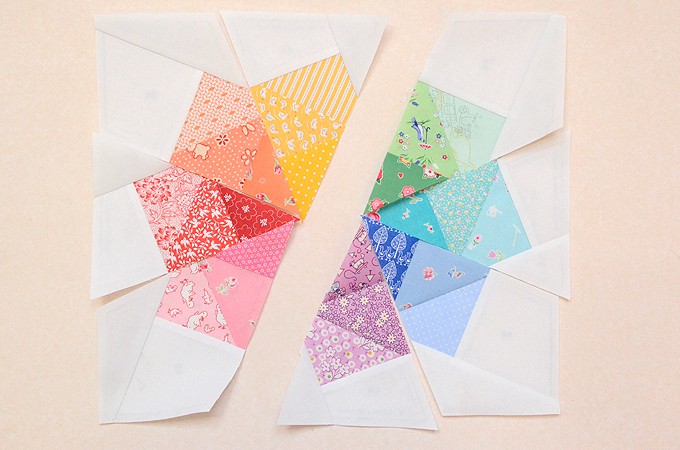
22. Um den Block zusammenzunähen, jeweils 1 Einheit A und 1 Einheit B links auf links legen, feststecken und entlang der äußeren Linie zusammennähen (siehe Abb. unten). Alle Nähte in eine Richtung bügeln.
To assemble the block, layer one Unit A and one Unit B with wrong sides together. Pin in place and sew along the outer line (see image below). Press all seams in one direction.
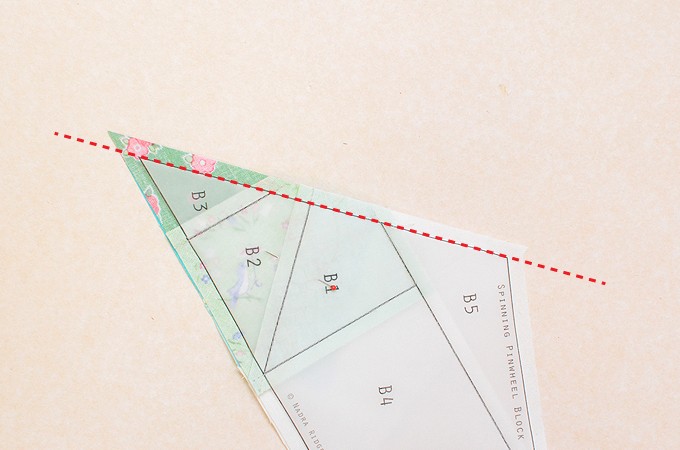
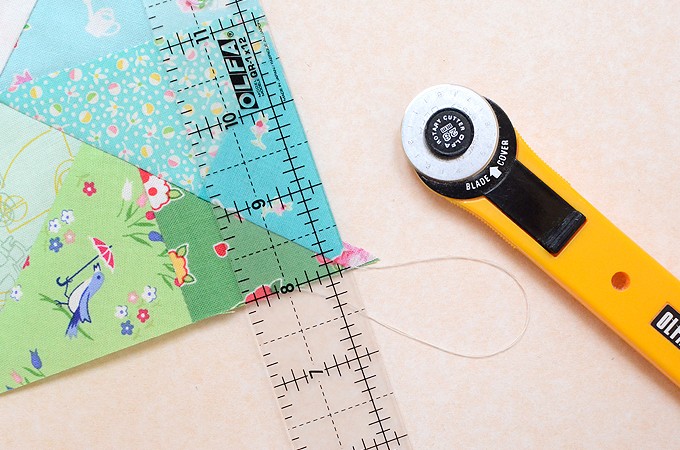
23. Überstehenden Stoff abschneiden.
Trim off excess fabric.
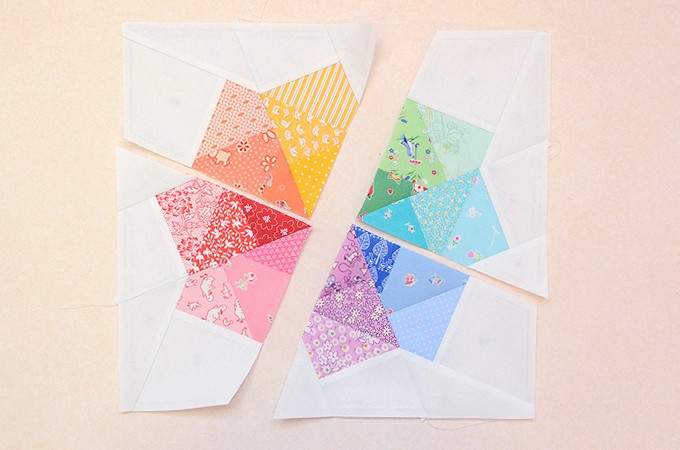
24. Jeweils zwei A/B Einheiten links auf links legen, feststecken und entlang der Linie zusammennähen. Nähte in die gleiche Richtung wie vorher bügeln. Überstehenden Stoff abschneiden.
Layer each one A/B Unit with wrong sides together. Pin in place and sew along the line. Press all seams in the same direction as previously done. Trim off excess fabric.
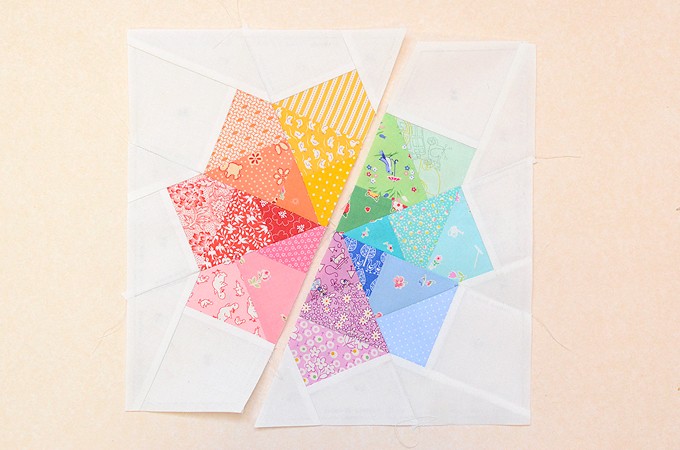
25. Beide Blockhälften links auf links legen, feststecken und entlang der Linie zusammennähen.
Layer both half block units with wrong sides together, pin in place and sew along the line.
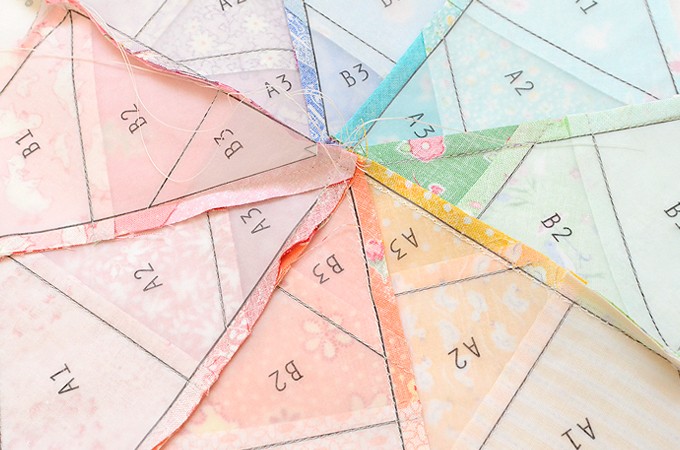
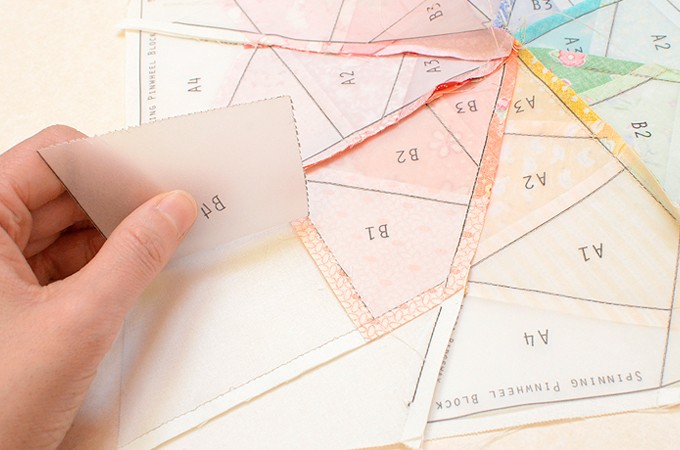
26. Vorsichtig das Papier entfernen. Anschliessend die Mittelnaht auseinanderbügeln.
Carefully remove the papers. Press the middle seam open.
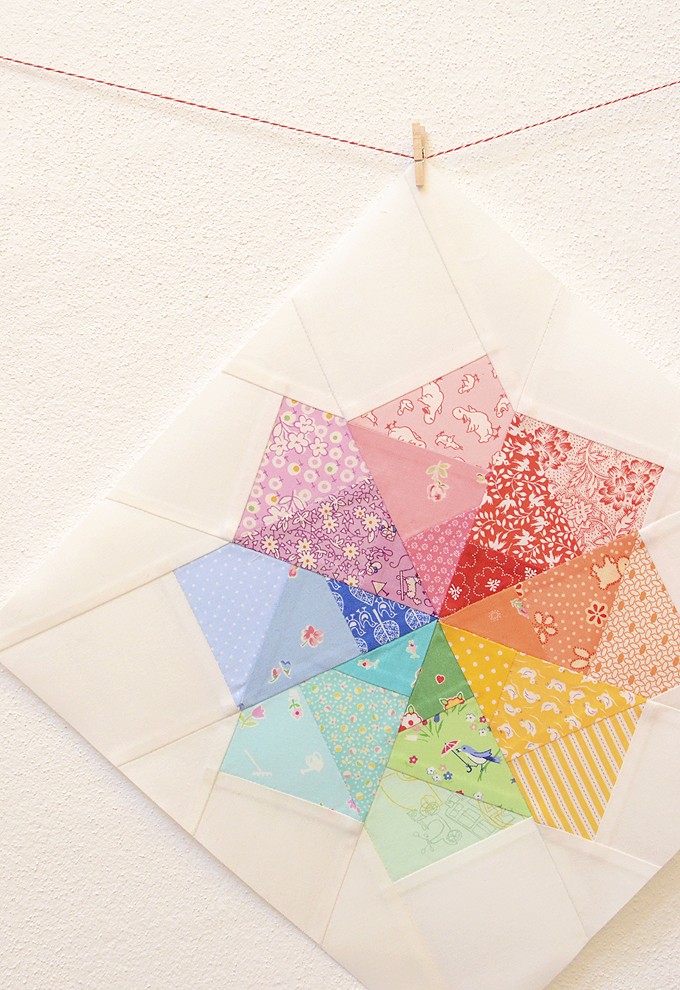
ET VOILÀ!
Ihr könnt so viele Blöcke nähen wie Ihr schafft und einen Riesen-Quilt daraus machen. Oder Ihr macht es wie ich und näht Euch einen Mini Quilt. Dazu braucht Ihr ausserdem 15″ x 15″ (38 x 38 cm) Vlieseinlage, 15″ x 15″ (38 x 38 cm) Rückenstoff und ca. 1 Fat Quarter Stoff für die Einfassung. Ich hoffe es hat Euch Spaß gemacht! Wenn Ihr mein nächstes Tutorial nicht verpassen wollt, meldet Euch für meinen Newsletter an!
You can sew as many blocks as you like and make a gigantic king size quilt. Or just stick to the mini quilt version like I did. For the mini quilt you will need 15″ x 15″ of batting and 15″ x 15″ of backing fabric and approx. 1 fat quarter for the binding. I hope you had some fun! Subscribe to my newsletter, if you don’t want to miss my next tutorial!
