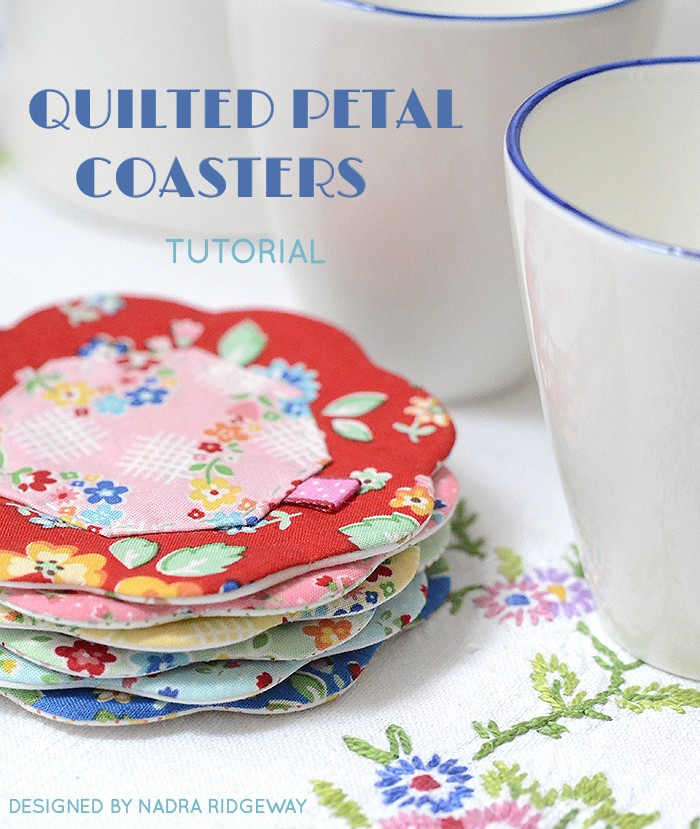
MATERIALIEN
Quilted Petal Coasters Template hier herunterladen (>>klick)
- (2) 5″ x 5″ (13 x 13 cm) Stücke Baumwollstoff für Vorder-und Rückseite
- (1) 3.25″ x 3.25″ (8,5 x 8,5 cm) Stück Baumwollstoff für das Hexagon
- (1) 5″ x 5″ (13 x 13 cm) Stück einseitig aufbügelbare Vlieseinlage (zB. H630 von Freudenberg)
- ca. 2″ (5 cm) Webband
Außerdem: Stickgarn (zB. 12wt von Aurifil), Sticknadel, Ecken- und Kantenformer, Markierstift, Textil-Klebestift, Schere, Stecknadeln, Sprühkleber
MATERIALS
Quilted Petal Coasters Template – download here (>>click)
- (2) 5″ x 5″ pieces of cotton fabric for the front and back
- (1) 3.25″ x 3.25″ piece of cotton fabric for the hexagon
- (1) 5″ x 5″ one sided fusible webbing (H630 von Freudenberg)
- approx. 2″ woven ribbon
In addition: Hand quilting / embroidery thread (12wt by Aurifil), embroidery needle, turning tool, marking pen, textil glue pen, scissors, pins, temporary fabric adhesive

ANLEITUNG
Schnittmuster und Hexagon-Schablonen herunterladen, ausdrucken und ausschneiden. Ich empfehle dir, Karton zu verwenden, dann lässt sich das Schnittmuster besser nachziehen und die Hexagons leichter formen.
INSTRUCTIONS
Download the pattern and the hexagon templates, print and cut them out. I recommend printing them on card stock for easy tracing and shaping.

1. – 4. Mit Hilfe der Schablone ein Hexagon aus dem kleinen Stück Baumwollstoff herstellen. Ich nehme am liebsten einen Textil-Klebestift zu Hilfe, du kannst aber auch die traditionelle Methode anwenden.
Falls du das noch nie gemacht hast, hier sind zwei Anleitungen, wie man Hexagons herstellt: einmal die Klebestift-Methode (>>klick) und die traditionelle Methode mit Nadel und Faden (>>klick).
1. – 4. Make a hexagon using the small fabric square and the template provided.
If you’ve never made hexagons before, here are two quick tutorials on how to make them: Glue pen-method (>>click) and needle and thread – method (>>click).

5. – 6. Das Schnittmuster auf die Rückseite des Vorderseiten-Quadrats legen und mit einem Markierstift umranden.
7. Das Rückseiten-Quadrat mit der linken Seite auf die beschichtete Seite der Vlieseinlage legen und nach Anleitung des Herstellers aufbügeln.
8. Beide Quadrate rechts auf rechts aufeinanderlegen und evtl. mit einer Stecknadel fixieren.
9. Einmal komplett herum auf der eingezeichneten Linie entlangnähen, dabei Anfang und Ende der Naht mit einigen Rückstichen sichern (es gibt keine Wendeöffnung!)
10. Den überstehenden Stoff knappkantig abschneiden.
5. – 6. Place the pattern on the wrong side of the front square and draw around it using a marking pen.
7. Place the back square with the wrong side on the coated side of the fusible webbing and iron on following the manufacturers instructions.
8. Layer both squares on top of each other, with right sides facing.
9. Sew along the drawn line, backstitching when you start and stop to secure (there will be no turning hole!)
10. Trim excess fabric fairly close to the stitching line.

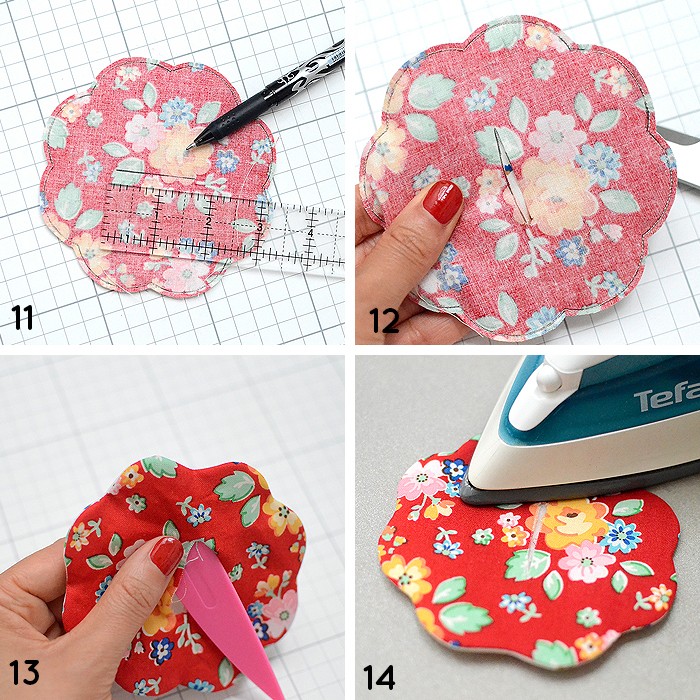
11. In der Mitte der Vorderseite mit dem Markierstift eine 1.5″ lange Linie einzeichnen…
12. …und vorsichtig mit der Schere aufschneiden (ACHTUNG: nur durch die Vorderseite schneiden!!). Das entstandene Loch ist die Wendeöffnung.
13. Nähstück wenden und die Kurven vorsichtig mit dem Ecken-und Kantenformer ausformen.
14. Anschließend bügeln.
11. In the middle on the front fabric layer draw a 1.5″ line using a marking pen…
12. …and carefully cut a slit (ATTENTION: only cut through the front fabric layer!!). You have now created the turning hole.
13. Turn right side out and carefully push out the curves using the turning tool.
14. Press flat.

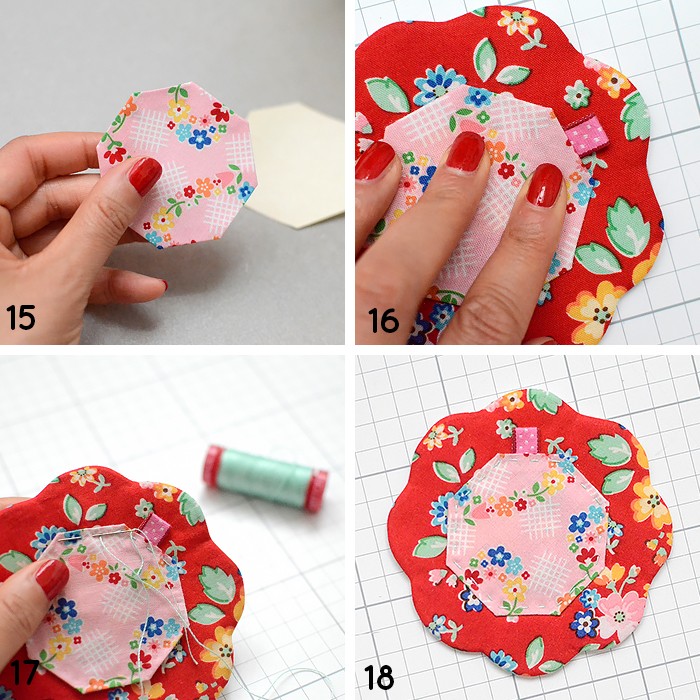
15. Die Papierschablone vorsichtig aus dem Hexagon entfernen und das Hexagon flachbügeln.
16. Mit etwas Sprühkleber mittig auf der Blüte platzieren. Das Webband einmal in der Mitte falten und an einer Seite unter das Hexagon schieben, so dass es ca. 1 cm herausragt.
17. Anschließend das Hexagon von Hand festquilten (natürlich kann dieser Schritt auch mit der Nähmaschine erfolgen!).
18. Voilà, fertig ist der Blütenuntersetzer – und jetzt gibt’s Kaffee und Kuchen! :)
15. Remove the paper from the hexagon and press flat.
16. Attach the hexagon to the middle of the petal using temporary spray adhesive. Fold the ribbon in half and insert under one side of the hexagon, with 1.5″ of the folded end sticking out.
17. Handquilt the petal around the edges of hexagon. Of course you can also attach the hexagon by machine using a straight stitch.
18. Voilà, you’re done – let’s have some coffee!