Wie man einen Wäschebeutel näht… How to sew a laundry bag…
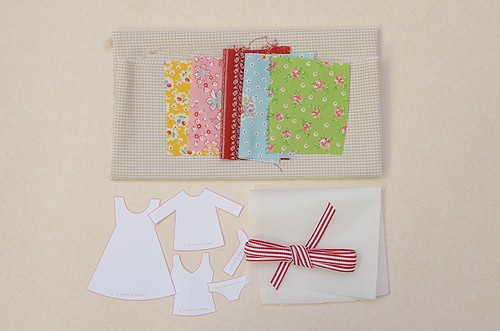
MATERIALIEN:
Schnittmuster hier herunterladen
1 x 36×80 cm Baumwollstoff
5 verschiedene Stoffreste
18 x 18 cm Vliesofix
90 cm Band, 1 cm breit
20 cm Satinband, 3 mm breit
Kleine Sicherheitsnadel, Bleistift
MATERIALS:
Templates download here
1 14″ × 31 1/2″ piece of cotton fabric
5 different fabric scraps
1 7″x 7″ piece of iron-on adhesive
35″ ribbon, 3/8 inch wide
8″ ribbon, 1/8 inch wide
Safety pin, pencil
1. Schnittmuster herunterladen, ausdrucken und ausschneiden. Ich empfehle Karton zu verwenden, dann lassen sich die Muster besser nachziehen.
Download the templates, print and cut them out. I recommend printing them on card stock for easy tracing.
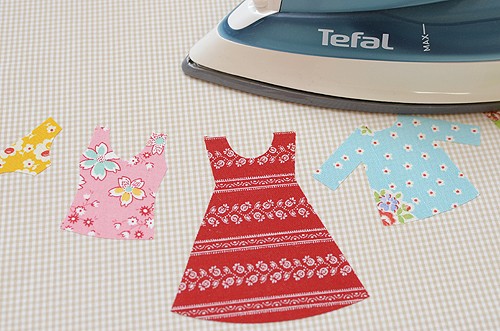
2. Schnittmuster mit dem Bleistift auf das Vliesofix übertragen, die einzelnen Stücke grob ausschneiden.
Place the templates on the iron-on adhesive and trace around it using a pencil. Cut out roughly.
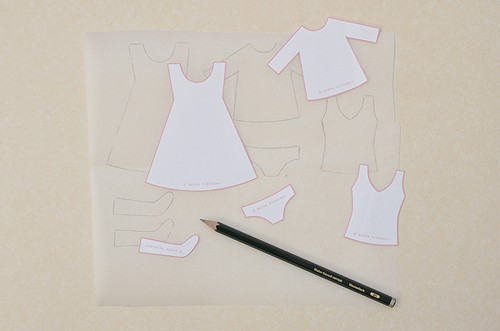
3. Vlisofix nach Anleitung des Herstellers auf die linke Seite der Stoffstücke bügeln.
Iron the iron-on adhesive on the wrong side of the fabric scraps, following the manufacturer’s instructions.

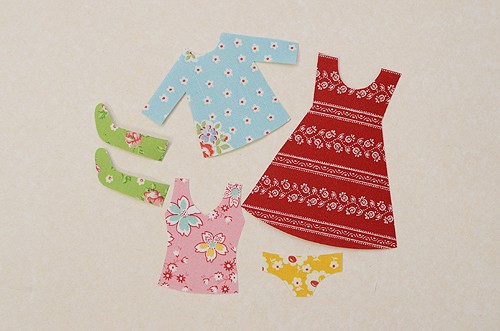
4. Die Kleider ausschneiden.
Cut out the pieces.
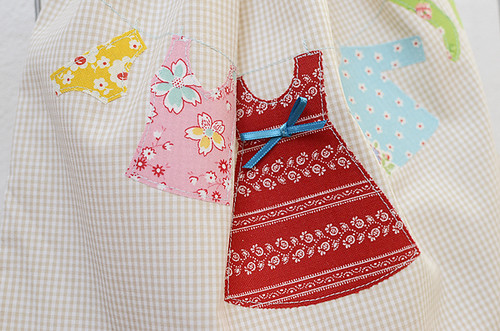
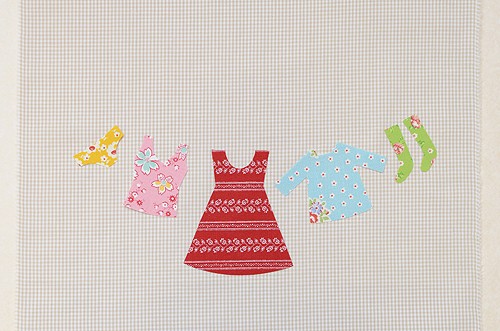
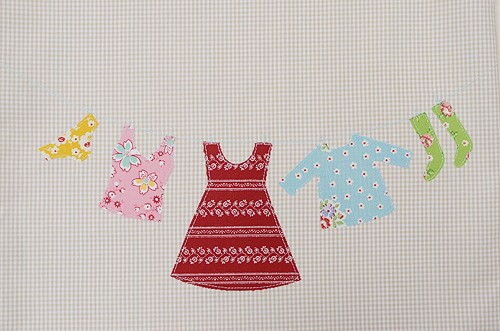
5. Die Applikationen mit der bügelbaren Seite nach unten in einem gleichmäßigen Bogen auf der Vorderseite des Soffes/Beutels platzieren und nach Anleitung des Herstellers aufbügeln.
Place your applique pieces sticky side down, on the front side of the fabric/drawstring bag, creating a consistant curve. Iron on firmly, following the manufacturer’s instructions.
6. Zuerst mit dem geraden Stich die Wäscheleine nähen. Dabei für die doppelte Naht einmal hin und wieder zurück nähen.
First sew the clothesline, using a straight seam, starting and stopping at the same point to create a double seam.
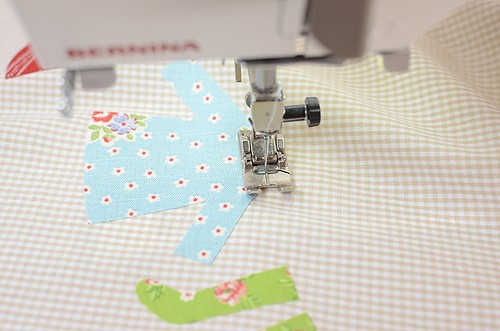
7. Jetzt jedes einzelne Kleidungsstück mit dem geraden Stich umranden, jeweils an einer „Wäscheklammer“ beginnend und endend. Fäden auf der Rückseite verknoten.
Now edgestitch each piece with a straight seam, starting and stopping at a „clothespin“. Knot the threads on the wrong side of the fabric.
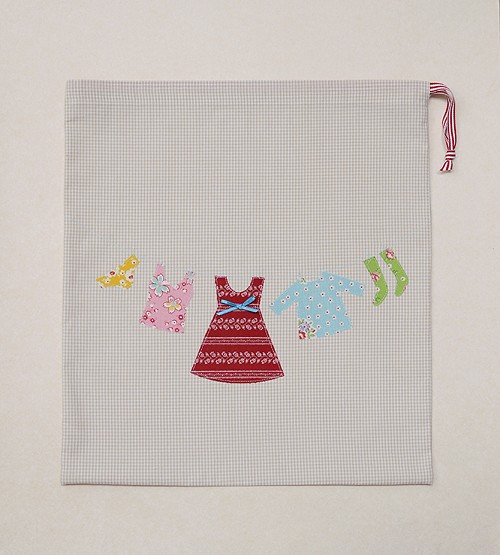
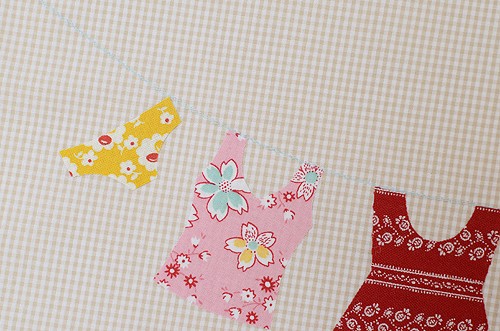
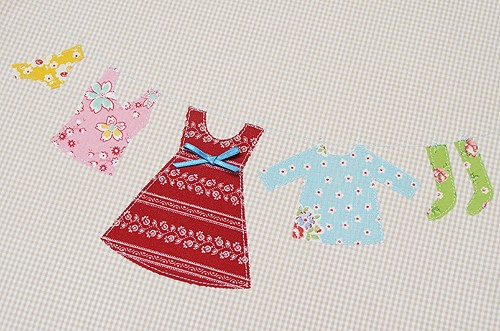
8. So sollte die Vorderseite jetzt aussehen:
Now the front should look like this:
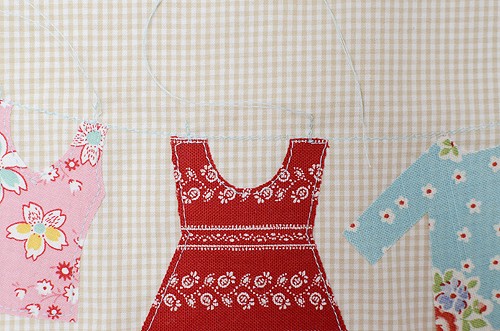
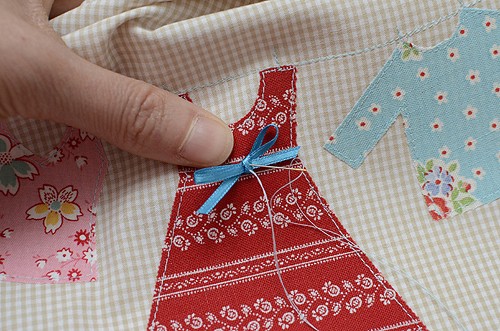
9. Aus dem schmalen Satinband eine Schleife binden und in der Mitte des Kleides mit ein paar Stichen annähen.
Make a bow from the small ribbon and hand sew it to the dress.
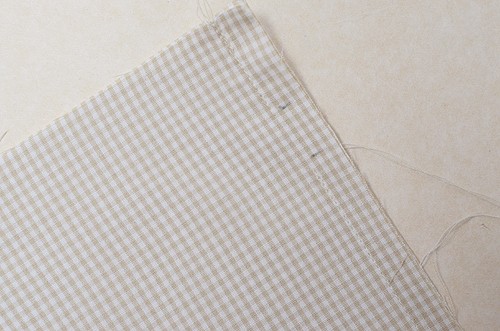
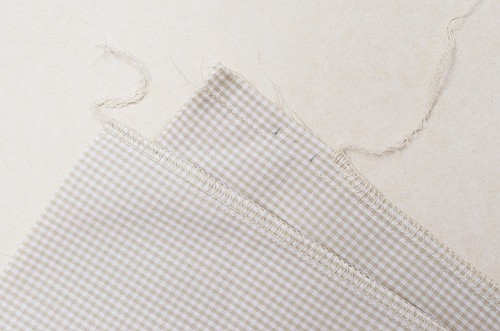
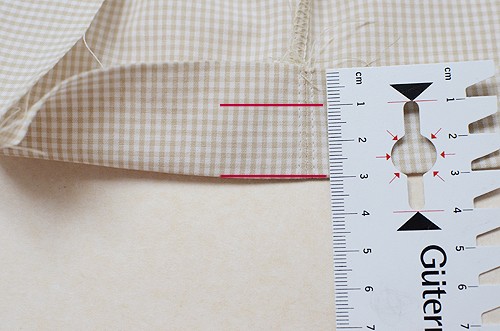
10. Um den Zugband-Beutel zu nähen, den Stoff auf links falten, so dass die Wäscheleine innen, unten liegt. Den linken Rand mit einer Nahtzugabe von 1 cm zusammennähen. Den rechten Rand mit einer Nahtzugabe von 1 cm zusammennähen, dabei ab cm 3 eine 1,5 cm lange Öffnung für das Band lassen. Beide Ränder mit einem Overlock-Stich oder normalen Zickzack-Stich versäubern. Beim linken Rand endet die Versäuberungsnaht kurz vor der Öffnung.
For the drawstring bag fold your fabric right sides together, clothesline down. Sew the left edge with a 3/8″ seam allowance. Sew the right edge with a 3/8″ seam allowance leaving a 5/8″ drawstring opening 1 3/16″ from the top. Finish off the edges by using either a serger or zig zag stitch. The serging seam on the left edge ends just below the opening.
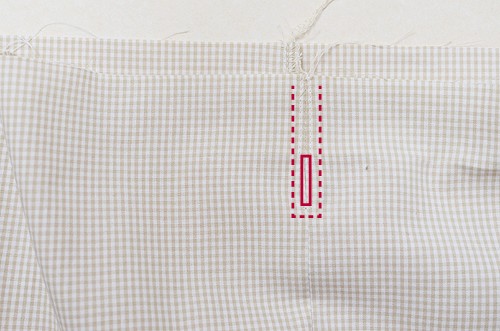
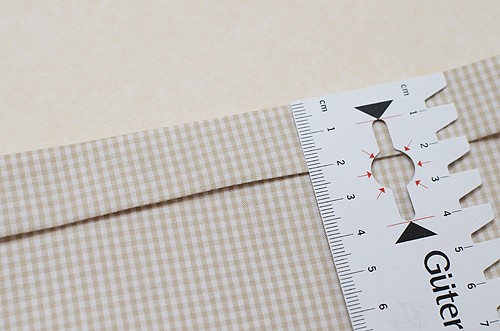
11. Die Öffnungsnaht auseinanderbügeln und wie unten dargestellt, mit einem geraden Stich umranden.
Press opening seams open. Sew around the drawstring opening with a straight seam as shown below.
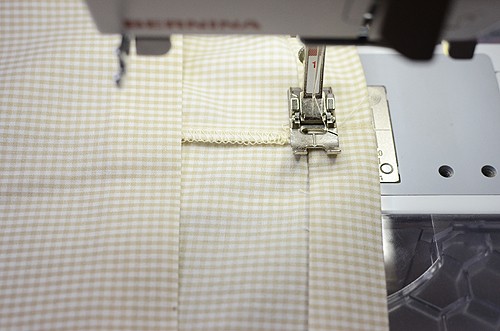
12. Den oberen Rand erst 1 cm und dann 2 cm umbügeln. So entsteht ein 2 cm breiter Schlauch für das Band.
Fold and iron a 3/8″ hem along the top of your bag. Fold it over another 3/4″ and iron flat. This will be the 3/4″ wide drawstring channel.
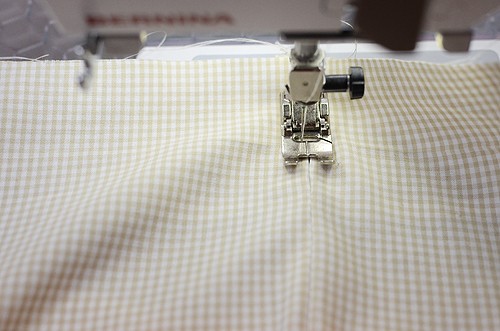
13. Den Schlauch knapp neben dem unteren Rand feststeppen.
Sew along the bottom edge of the hem with a fairly close stitch.
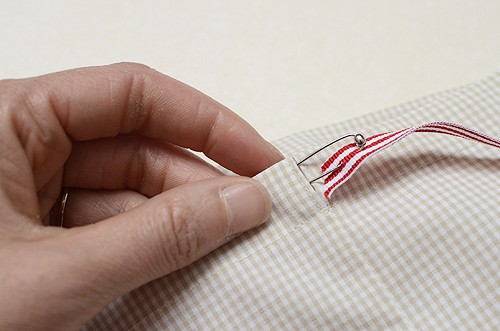
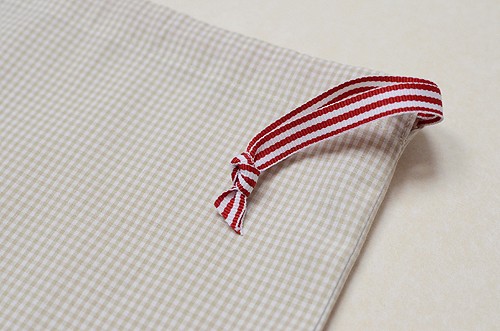
14. Das Band mit einer Sicherheitsnadel durch den Schlauch ziehen und verknoten.
Using the safety pin, thread the drawstring through the channel and knot the ends.
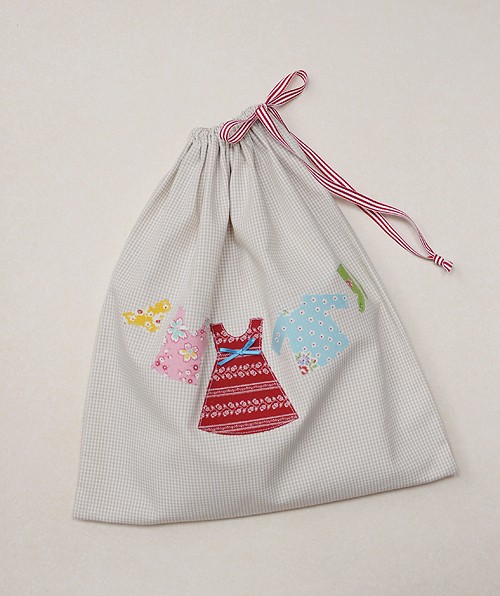
Und fertig ist Euer Wäschebeutel!
And your laundry bag is finished!